Easy Sourdough Bread Recipe, Plus Sourdough Starter Tips
This post may contain affiliate links. Read my full disclosure here.
This easy sourdough bread recipe from starter can be made with your homegrown starter or a purchased sourdough starter. Whichever one you choose, make sure your starter is active before baking sourdough bread.
Real sourdough bread requires an active starter to raise, since you don’t add extra commercial yeast. Feed your sourdough starter 6-8 hours before bread baking. (Inactive starter can be used for recipes like sourdough cookies, crackers or brownies.)

Buy Sourdough Starter or Grow Your Own Starter?
When I first made sourdough bread, I was nervous about cultivating my own starter. I heard a number of stories from friends who have had difficulty getting consistent results with their homegrown starters.
When I bake bread, I need bread (I knead bread, too, but that’s another story ;-). The loaves or rolls or whatever I’m making are part of our meal plan, and if they don’t bake correctly, it’s a problem.
I buy organic wheat berries and flours, and I can’t afford to be throwing out flopped loaves of bread. (I don’t think most of us can afford to throw away food, especially with rising food prices.) So, in the interest of successful sourdough right from the start, I bought a sourdough starter.
There are tons of sourdough starters available online, including:
- Alaskan Sourdough Starter (which I purchased)
- San Francisco Sourdough Starter
- Gluten Free Sourdough Starter
I took a break from sourdough for a time, and when I started working with it again, I made my own starter. The directions for creating a sourdough starter at at the bottom of the post.
PrintEasy Sourdough Bread
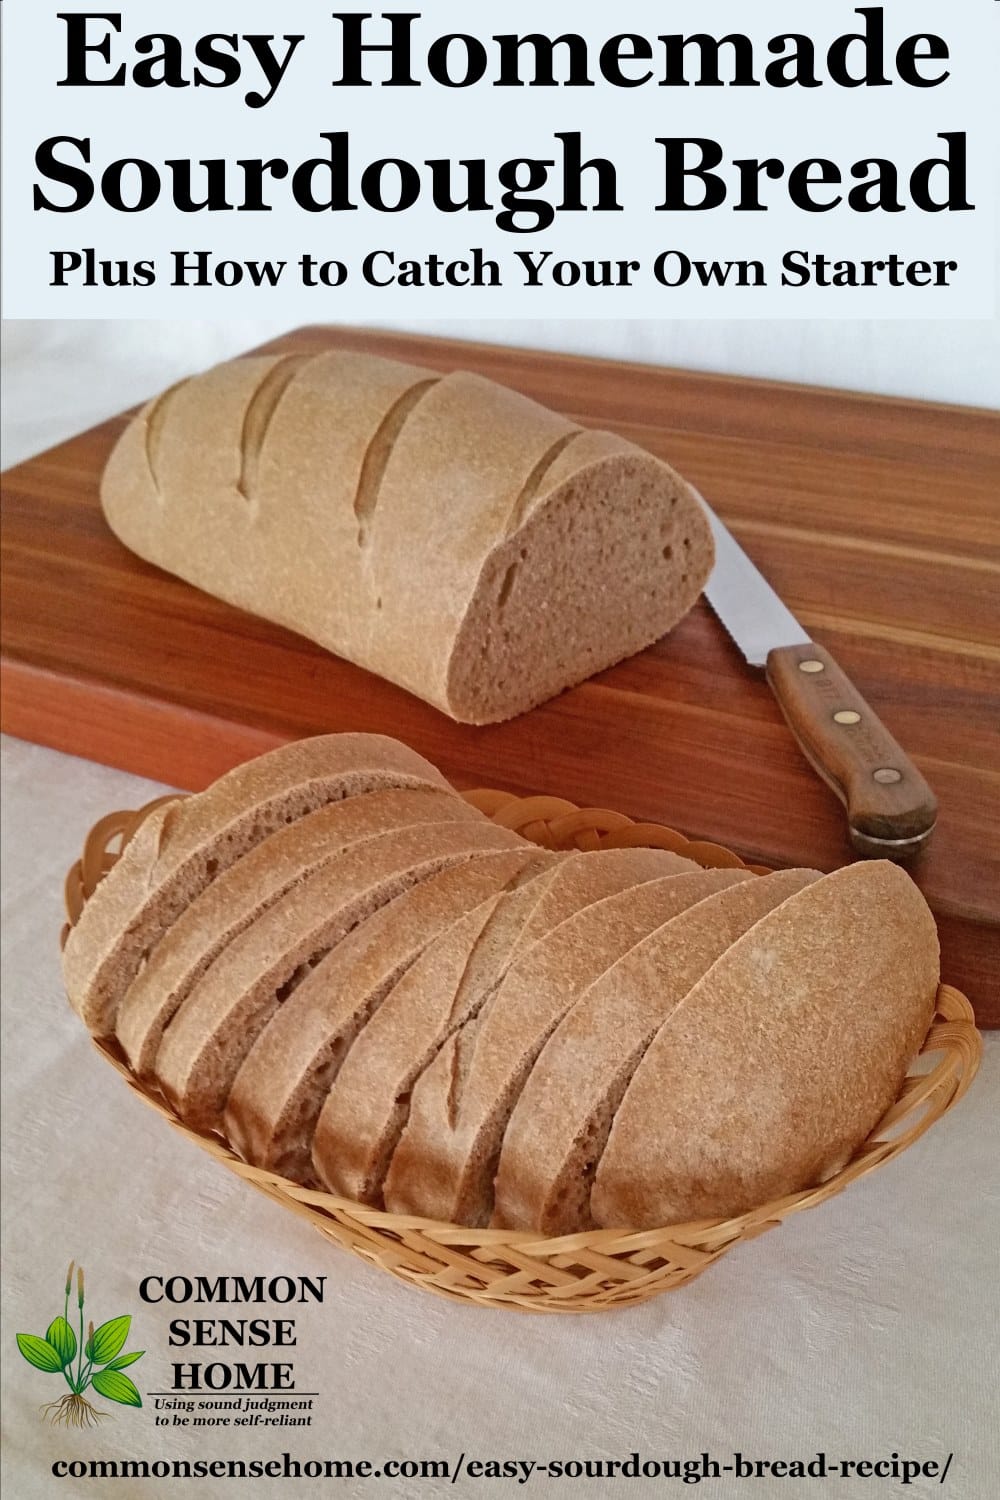
This easy four ingredient sourdough bread recipe makes a big, beautiful rustic loaf.
Ingredients
- 2 1/3 cups Fresh Sourdough Starter
- 3 1/3 cup Flour
- 1 – 1 1/2 cup Water (approximate)
- Scant Tablespoon Salt
Instructions
- Mix sourdough starter, flour and salt together. Use enough water to make bread dough (a moist dough is preferable to a dry dough). Knead dough until it passes the “window pane test” (a small piece of dough will stretch between four fingers thin enough to allow light to pass through without breaking).
- Shape the dough into a loaf . Place in a pan, proofing basket or on a board. Cover lightly with a towel and allow the dough to rise for 4-24 hours.
- If desired, a short (4-12 hours) proofing period can be used and the dough can be punched down, reshaped and allowed to rise a second time but a second proofing period is not required.
- Slice an “X” or slashes in the top of the loaf with a very sharp knife or razor blade. Bake at 400°F (205°C) until the internal temperature reaches 210°F (99°C). (Use a meat thermometer inserted into the bottom or side of the loaf to test the temperature).
- Bake 30-60 minutes (depending on loaf size). Allow the bread to cool before slicing.
Sourdough Bread Baking Notes
I made up my dough in my Bosch mixer. (After killing three bread machines, I decided to invest in something sturdier.)
It took over half an hour of kneading to get a nice “window pane” dough.
For my first loaf, I did a single rise after mixing. I eyed up the volume of dough that this recipe produced and decided to shape it into a single loaf and allow it to rise on a cookie sheet. Instead of an “x” on top, I made two parallel slices. This is important, as it gives the bread room to expand in the oven.
The loaf grew up HUGE! (You can see it took up most of a cookie sheet.) Inside, the texture was smooth and firm. The crust was appropriately chewy, but not tough, and it had a very mild sour flavor.
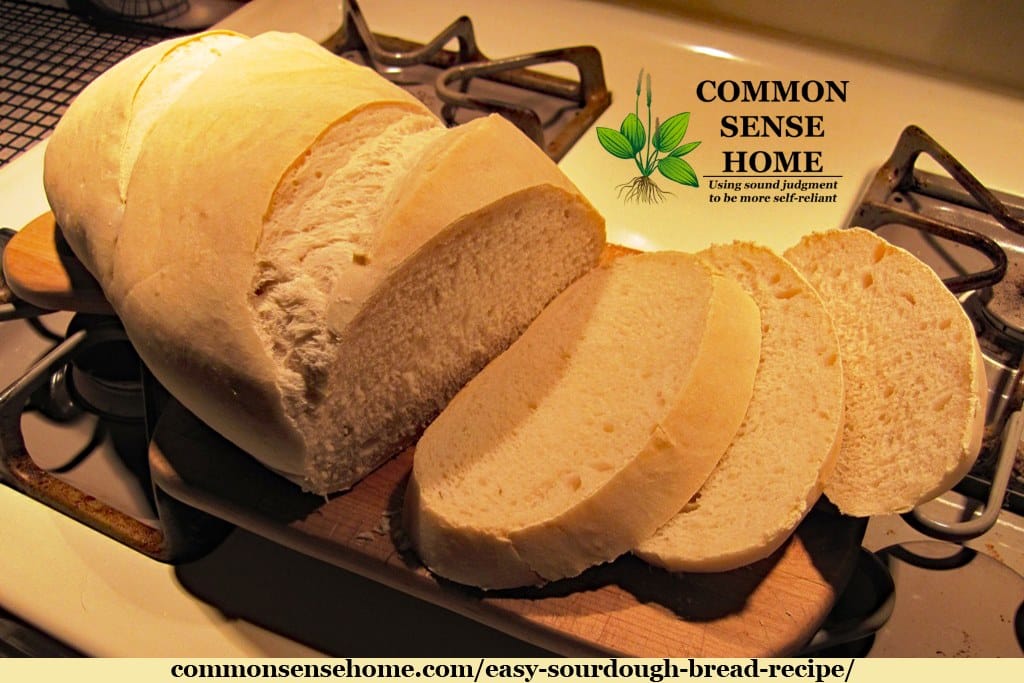
My youngest complained that it “tasted too much like store bread” (translation – all white flour is not normal for us).
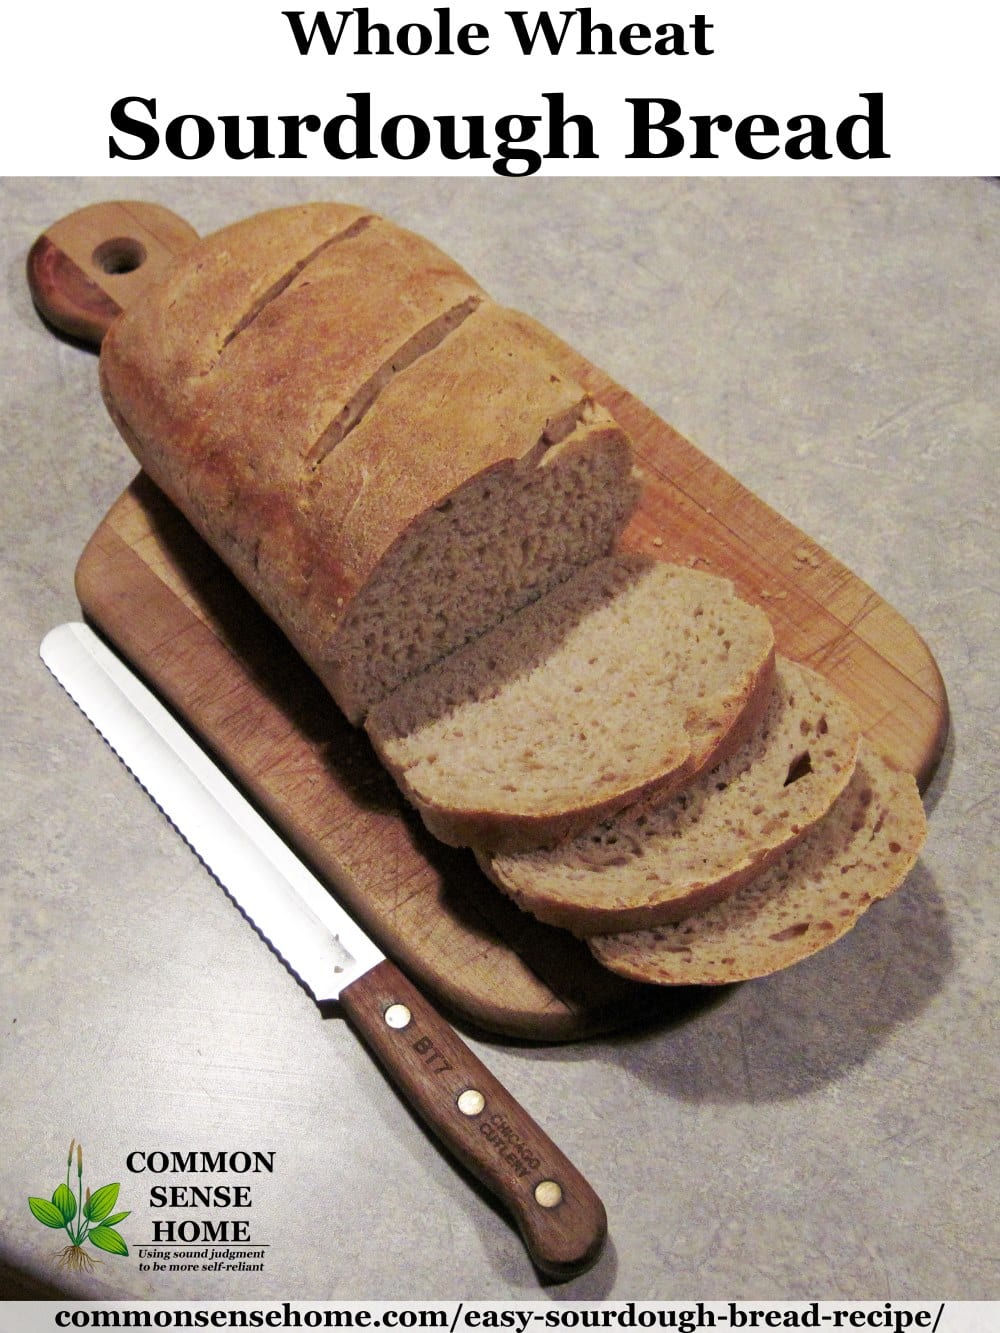
So the next time I fed my starter, I gave it half fresh ground hard white wheat berries and half white bread flour. When I mixed the dough, I used the same ratios. This time I divided the dough in two parts and placed it in bread pans.
These loaves rose beautifully, too (and my youngest approved of the flavor).
Bread Baking Books and Videos
Since these first loaves, I’ve ordered Wardee’s sourdough e-book and started experimenting with other recipes. Sourdough crackers are what we make the most, using her recipe base. I liked what she does so much I signed up as an affiliate. Wardee is the Queen of Sourdough and Fermented Foods, at least in my book. 🙂
You can get her Sourdough a to Z ebook and print book here. I’m a sourdough beginner, she’s a pro.
She also has an ebook and video series on baking with Einkorn flour. Einkorn is an ancient type of wheat that is lower in gluten and easier for some people to digest.

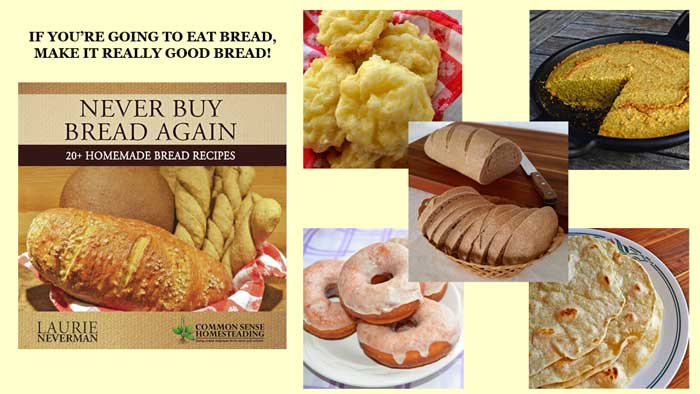
This recipe is also featured in my new book, “Never Buy Bread Again – 20+ Homemade Bread Recipes“.
This book will help you:
- Bake amazing homemade bread – even if you’ve never baked before!
- Avoid the preservatives and additives in commercial bread
- Learn how to store your fresh bread the right way to keep it fresh and delicious
- Save money by using basic pantry ingredients
- Make holidays extra special with homemade sweet breads like Gram Irene’s cinnamon rolls
Would you like to save this?
Now available in spiral bound print edition and digital formats here.
Easy Sourdough Bread Starter and Tips for Starter Use
To capture your own sourdough starter, start with whole grain wheat or rye flour and pure, unchlorinated water. Place about 4 ounces of flour (scant 1 cup) and 4 ounces (1/2 cup) warm water in a non-reactive vessel. Mix well.
You can use a wide mouth Mason jar, other glass, steel, crockery or food grade plastic. Your container should be around 4 cups in volume, as the starter will expand as it becomes active.
Cover the container with a coffee filter or flour sack towel secured to keep larger critters out. Place in a warm location such as near a stove or on top of the fridge. You can even use a heating pad if you like – just make sure it’s not too hot by placing a folded towel between the heat source and the starter.
Let sit 24 hours.
Day 2 with your sourdough starter
On day two, discard half of the starter mix. This can go into the compost. Add the same amount of flour (you make use white flour if you like) and water that you used on day one. Mix well, cover, and less rest another 24 hours.
Day 3 with your sourdough starter
By day three, you should be starting to see bubbles. Discard half the starter (or use it to make brownies, cookies, pancakes other baked goods that don’t require a very active starter.
To get your starter into high gear for bread baking, you should start feeding it twice a day, roughly 12 hours apart.
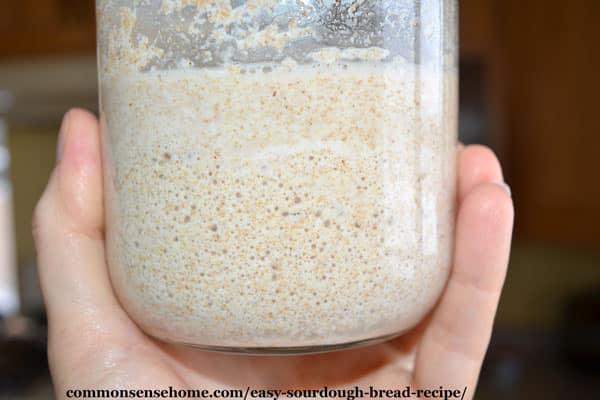
After about a week of feeding, your starter should bubble very actively and have a slightly sour aroma. The starter should roughly double in volume each time it is fed.
When the starter is ready, feed the starter and let it rest at room temperature for 6-8 hours before using in your recipe.
Storing and Using Your Sourdough Starter
To store your starter, place it in a loosely covered container in the refrigerator.
Note: It is best not to refrigerate your sourdough starter until it is at least a month old, because it will strengthen over time. The starter should be fed right before storage, and should be fed at least weekly to keep it healthy.
If you do a fair amount of baking/cooking with sourdough, keeping it out at room temp with regular feedings. (Feed your sourdough starter once a day for maintenance, twice a day when you need an active starter.)
Grinding Your Own Flour
I recommend the NutriMill Classic Grain Mill for grinding your own fresh flour. It’s compact, easy to use, and doesn’t heat up the flour like some other mills.
Is Sourdough Healthier Than Other Bread?
Maybe, maybe not. Every person is different, with a different microbiome. Some people do find sourdough easier to digest than breads made with commercial yeast. I haven’t personally noted a difference. Homemade bread of any type sits better in my belly than industrial bread with its long list of ingredients.
The study “Bread Affects Clinical Parameters and Induces Gut Microbiome-Associated Personal Glycemic Responses” notes:
We demonstrate statistically significant interpersonal variability in the glycemic response to different bread types, suggesting that the lack of phenotypic difference between the bread types stems from a person-specific effect.
We further show that the type of bread that induces the lower glycemic response in each person can be predicted based solely on microbiome data prior to the intervention.
Basically, sourdough bread spiked the blood sugar of about half the people in the test more than regular white bread, and the other half of people tested just the opposite.
Another study from the University of Guelph (The Acute Impact of Ingestion of Sourdough and Whole-Grain Breads on Blood Glucose, Insulin, and Incretins in Overweight and Obese Men) fed four different types of bread to overweight dudes, and found that sourdough breads had the most positive impact on glycemic response, specifically:
Insulin area under the curve (AUC) for sourdough and white was lower than 11-grain and sprouted-grain breads. GLP-1 response to sourdough was lower than all breads.
Note that this study worked with people who were already obese, where the other trial did not specifically recruit heavy volunteers. Pay attention to how you feel when you eat bread. Try different types (or going without) and see what works best for you.
Originally posted in 2011, last updated in 2017.
Hi,
How are you making the 2 1/3 cups starter for this bread? – ex. how much active starter and flour are you mixing to have that much? (I’m assuming you aren’t using your refrigerated discard).
I’m trying your recipe today, so last night I mixed my discard with about 110g of flour. This morning it looks like close to 2 1/3 cups, but I wish that I had a gram measurement instead of cups.
Each starter behaves a little differently and may be more wet or dry, use different flours, etc. You don’t need exactly the amount, close is close enough.
When I’m feeding the started to prep for bread, I may have around 1 cup of starter, then add about a half cup of water and a cup of flour. This should give enough active starter for the recipe, plus leftover starter to feed for the next round of baking. If I’m making more than a single batch of bread, I’ll prep more active starter, and use what I need for each recipe.
I had a busy weekend and haven’t touched my sourdough starter in Two days. Will it still be good to remove some dough and feed again? How long can it stay in the pantry without baking?
Thank you!
It really depends on the starter and the conditions in the pantry. If the starter is active and healthy, it may be okay for several days. For longer storage, you should keep it in the refrigerator. As long as there’s no mold, you should be able to feed it and get it going again.
Hi! I purchased your book never buy bread again!! but now when I finally purchased a nice mixer I seemed to have lost the book! anyway, I started a gluten free sourdough starter from the San Fran company, its made with rice flour and Im just following the instructions that came with it so far does not seem to have much activity but I will keep feeding it and trouble shooting it.
so I was wondering can I just sub the flour in your sourdough recipe with any gluten free flour? do you have any idea if I should stick with rice flour since the thats what is used in the starter or can I use another gluten free flour? thanks!
Gluten free flour tends to behave a little differently that wheat flours, so if you have a recipe or recipes specifically geared for the starter you chose, I’d opt for those first. This recipe is pretty simple, so it may work, but I haven’t attempted gluten free sourdough yet. My friend, Wardee (with the sourdough course linked in the post), has experience working with gluten free starters and recipes, and shares them in the course.
I am just wondering where you got the ‘Alaskan’ Sourdough starter from?? Also, I have never heard of throwing starter away, at any time in the fermenting process…????
You don’t have to throw the starter away if you have enough baking to do with inactive starter. I don’t. I ordered the starter online. I’ve made the link more clear in the post.
The Sourdough bread calls for a starter and you posted a link but which is used for the white flour sourdough that is pictured? The link for the starter shows different ones.
I used the Alaskan sourdough starter, since I live in a cooler climate.
I am thinking of buying a new oven to (mainly) bake bread among other things. Should I get electric (i live in Manila where electricity is too expensive) or a gas oven? Any suggestions?
Thank you!
I have a GE natural gas oven adapted for use with propane (our main fuel source here) and am very happy with it. I prefer gas over electric, if given the choice.
Please help. I so want to make this bread, but am very allergic to flour. Does anyone know what could be substituted for wheat flour?
Jacalin, other flours don’t behave the same as wheat flour in baking, so it’s not simply a matter of substituting one for the other, but we have a round up of bread recipes in this post – https://commonsensehome.com/bread-recipes/, including several that are gluten free. Hopefully some of them will work for you!
Just so you know, that purchased starter will eventually die no matter how much you feed it or take care of it.
Starter is very local. The stuff that grows in it that makes it starter is very local and finicky. So when it’s relocated, eventually it doesn’t thrive.
That’s why it’s always best to make your own starter. It can be done and safely. You just have to be picky about it. Use bottled water. Don’t keep it at room temperature after it gets started. You can move it into the refrigerator and feed it once a week. And don’t keep it in an airtight container. Just cover it loosely with gauze. King Arthur Flour makes a really nice ceramic crock with a no air tight lid for keeping your starter.
My starter’s been going strong for over a year, now, so it seems pretty happy. Of course, I’m sure there’s quite a bit of yeast around here, so I’m guessing that it’s adapting to it’s surroundings.
Danielle – I'm noticing quite a variation in flavors depending on how long it rises and how aged the starter is when I mix it with the dough. Did you post about the sourdough on your blog? I just did a quick search on "sourdough" in your search box and came up with no results.
This is inspiring! I made sourdough several times a few months back before my husband told me he was not really that wild about the sour flavor. 🙂 I loved the tips I got at sourdoughhome.com, though. They have recipes for every type of bread imaginable!
Thanks, Diana! I love sharing stories with other foodies. It's a great way to get inspired.
My goodness! That's a lot of comment. Thanks for sharing – lots of good tips there, things I largely take for granted, but not so obvious to beginners, I'm sure.
The Bosch warms up a bit while it's mixing, not enough to overheat, but enough to help the dough rise. I confess, I could knead by hand, but I'm usually off doing something else like teaching the boys. I use Superparchment on my cookie sheets to avoid sticking and grease my bread pans with lard. I normally just cover my bread with a flour sack towel while they are rising, but I'll have to try a damp cloth next time around.
As for the quality of home baked bread versus store bought – my boys will generally avoid eating bread away from home. They just don't like it. I personally have a tough time even walking through the pre-packaged bread aisle in the grocery store. It always smells like stale bread to me. I dropped off a small loaf of the bread with my in-laws yesterday (my FIL is diabetic), and they both gave it a thumbs up.
Beautiful Laurie!!! You've inspired me to get my sourdough back up and going! Thanks so much for sharing on Simple Lives Thursday 😀
6) When your dough has risen twice its size and is ready to punch down it will do so quite easily.. now at this point you can work it into a loaf or let it rise again… I found one must be carefull here.. the starter strength is key. Does it have the strength to go through a 2nd rise..? Knocked down formed and then have to rise again in the oven?
With sour dough many have found that long slow rising was key to a great flavor loaf.
There is alot of room for experimentation for sure and I think no two bakers will ever agree all the way through the effort.
Forming the loaf; When your ready to take your dough after knocking it down and make your loaf the act of kneading it typically involves folding the loaf in half upon itself and pushing down and through or away from you.. flipping it folding it and pushing down and through away again and again. Once your ready to form the final loaf ball lay the dough on the table with the folded crease up.. (be sure you kneaded out any air bubbles.. now begin pinching the crease together..pinch, pinch from center to end and then grab the ends and fold them into the center crease slightly drawing them in and pinch until there is no sign of a crease anywhere.. gently form the ball and flip the dough so where the crease was.. is now on the bottom.. this will be set into the bread pan or on the bread stone (where the crease was is DOWN). Now the 2nd or final rise.. Now you want the outer dough surface to be moist enough so it does not develop a skin which impedes the rising.. so cover it with a damp cloth. I found that again a bit of olive oil helped keep it moist.
I also would use olive oil on the bottom of the bread pan or stone and then sprinkle with wheat germ or ground flax or corn meal as this would allow the loaf to fall out easily.
The olive oil will allow you to sprinkle somthing on the load as well.. like a few oats etc..
Once the loaf is sufficiently risen.. slice it how you will.. typically on slice 1/4-1/2 inch deep with a very sharp knife.. the razor blade is best. I will even oil it.. you do not want drag. Then pop it in the preheated oven.
The bread I typically cook for 3/4 of the time in the pan and then the final few minutes out.. this helps the bottom develop a bit of crust as well. Simpy tip the bread pan upside down and let the loaf finish on its side. You know its done by a simple tap on the bottom of the loaf. It should have a hollow sound.
There are so many more tricks.. and I did not intend to go on about this tonight.. nor was I looking for anything on the subject… but after reading the mood caught me and I thought I would offer a few tips to anyone who was interested.
For what its worth.. there is NOTHING like fresh bread made at home with the best of ingredients. Contrary to popular products.. bread does not need high fructose corn syrup, emulsifiers, texture agents, coloring, and whatever else they add to make it sit on the shelf for weeks…
It is worth learning and great exercise for the arms!
I am a Firefighter, Emt, Health Coach and Trainer, survivalist, researcher, Home designer, remodeler, kitchen designer, finish carpenter, and best of all a husband and dad of four beautiful kids! Life is full of things to do.. and as you can see I have not been wasting time!
Peace
Excuse any typos or grammar issues I am not going to proof this.. I got to run!
5) Now once I get it where I want it I will let it rest for a bit until I get the next ball made or two. Be sure to cover it with a damp cloth or plastic wrap to keep them moist.
6) I then take each one in order and start the needing.. I do not add the salt until the very end… why? Try it.. it makes forming and kneading way easyier as the salt toughens the proteins up. So knead away until the dough is nice and pliable. This is to make sure the starter is well mixed throughout the dough and feeding well. Toward the end add the salt (a little at a time). I simply continue to sprinkle it on the board as I knead.
I then add olive oil to the glass bowl..still warm drop the bread ball in roll it around until it is all slightly oiled. Then cover the bowl with a damp towel or plastic and put it in a place where the temperature is consistantly warm.. body temp. Now here is where people mess up… if it is summertime and warm.. anywhere is fine. If its really hot.. you will not need to wait long. If its cool..it will take longer.
Keep an eye on your baby! This is another great reason for a glass bowl. However.. if you leave it in a place that is cool the bowl will cool (being glass) and cool the dough off. Some serious breadmakers will have a rising cabinet.. This can be made by inserting a light bulb in a cabinet (plugged in and turned on of course) hehe 😉 If you make one, turn the light on and leave it on with a thermometer and get an understanding of what the average temp will be.. if its too hot try a lower amp bulb.
Some people get this down to a science.
Take notes if you can on what you did each time you make bread.. and each thing you do different and what you notice.. trial and error are great teachers..
😉
A few years ago I dove into bread making as well, first digging, researching and reading anything I could get my hands on. I have books from Great Britian that go way back.. It is amazing how powerful bread was as a comodity. There was a time where it was so controlled in Britian that you could not bake your own bread.. you made your dough, formed it and had to bring it to the Baker to bake. There is much history surround the levened loaf that is for sure. The techniques were intriguing.
Like most recipes that explain breadmaking much is often left out as far as instruction. Following the recipe on the back of a Kings Authurs flour bag will more than likely leave any eager homebaker frustrated.
Some think this is with reason… the store sells flour.. but would much rather you buy their pre-made bread…(although I would argue that most of it is not worthy of the title).
There are tricks along the way that really help! It has been months since I have made our own due to my job and career training.
I would offer a few Tips (you probably already use) for those new to this worthy and important skill.
I have found that first making your dough too;
1)warm the flours used in a glass bowl in the oven prior to mixing. Just warm.. not hot. Body temperature is good.
2)Same is true for the water, you use to mix the ingredients. It should also be warm to the back of your hand. Pretend your warming a bottle for your baby,(essentially, you are;) test the temperature,if it feels to hot.. it is…
I like to use a large glass bowl vs metal. And will fire the stove for a minute and shut it off. Then place the bowl in.. this way I do not risk overheating it.. then go prepare the rest of my ingredients or set up my bread pans etc..
3) Starter needs to be fed for a few days to make sure its 'up for the job.' If it has been stored in a frig. The frig will slow it down to such a point you do not need to feed it every day. A starter can be cut and even frozen for up to 6 months.. thawed, fed and your back in business.
4) Settlers used to wear a small vile around their neck with a very small amount of starter.. by being on their chest their body temperature would keep it nice and cozy and thriving. They would feed it once a day. When they got where they were going they would continue to feed it doubling its volume with each feeding until they had enough again to make bread… pretty cool stuff.
I will take the bowl out mix the dry warm ingredients together than make a hollow or depression in the flour and add my starter.. if I am doing somthing else I will let it sit there.. it is quite happy and exited by this of course and you should see the happy bubbles.. The flour is warm its feeding and everythings happy in its universe. Then I will begin adding water and working the flour from the edges into the starter continue to add water until you reach a consistency where the dough does not stick to the bowl.
To much water will make the dough ball sticky.. no problem have more flour on hand.. simply sprinkle more flour until you reach a consistency where you can handle it without it sticking to your fingers or the bowl.. Now the final texture takes time.. a dry feeling ball will moisten up typically with a little needing.
Thanks for your comments on the Sour Dough recipe. You have helped me to understand a few things that I was puzzled over when making Sour Dough Bread.
I like the way you described what you were talking about, even tho I have made bread for a few yrs now, I like the explanations you gave, and the reasoning behind every thing you said.
Thanks again!
It’s a little different than regular baking, that’s for sure. The GNOWFGLINS course is wonderful in how it explains all the ins and outs of making just about everything from sourdough.
Beautiful bread! I think it's hilarious that your kids complain about it being too much like store bread- good for them! I wish my hubby would complain about that, but his complaints usually are the opposite. ("I wish this was more like the bread you buy from the store…")
BEE-UTE-TEA-FUL simply beautiful! And I might scrumptious looking, too.
As to gluten sensitivity as per Cheeseslave's post. I wrote her or commented at the time of the post if she got any information from this man on actually how long of a slow fermentation he did and what was his method for doing it over time to make it 100% free of gluten so they could eat it. It's got to be truly free for those that have a high to severe intolerance to glutens. She was to find out from a class she was to take but never heard what she found out. Sourdough I know works well for those that have a low level intolerance.
So that's why I am really interested in Donna's method and of course her Russian / Finnish Starter. What is of real importance when it comes to those with Celiac's is if they get even the lowest level of gluten into their digestive track / or the cheat from time to time, damage will continue to happen to their digestive track.
I sure hope you enjoyed this bread warm and with lots of BUTTER girl!!!
Pamela
I guess I should have read the post before I asked a question, that way I would have seen that you haven't tackled the dark breads yet. I like rye breads the best but I noticed that it is not that common here in US.
Your bread looks very yummy..