Starting Seeds Indoors – Includes Troubleshooting Tips
This post may contain affiliate links. Read my full disclosure here.
Starting seeds indoors may seem challenging, but this guide will take you through the process step by step, with troubleshooting tips to make it easy.
Why Start Seeds Indoors?
- Get a jump on the gardening season. Starting seeds indoors is a must for northern gardeners who want to grow warm weather crops like tomatoes, but many plants do better when placed in the garden as transplants.
- Save money! If you plant a big garden, growing your own seedlings can be more affordable than purchasing plants, especially if you use recycled containers and homemade seed starting mix.
- Grow healthy plants. I’m sure I’m not the only one who has felt sorry for how the plants are treated at some garden centers. When you start seeds yourself, you can give them plenty of TLC.
- Get access to more varieties. Why grow only russet potatoes when you can grow potatoes that are purple, yellow and red? Why grow only red, ping pong ball tomatoes when you can grow tomatoes that pink, purple, green-striped, yellow, orange, white, turban-shaped, sausage-shaped – there are literally thousands of options. If you’re looking for ideas about where to buy seeds, you can check out my favorite seed sources.
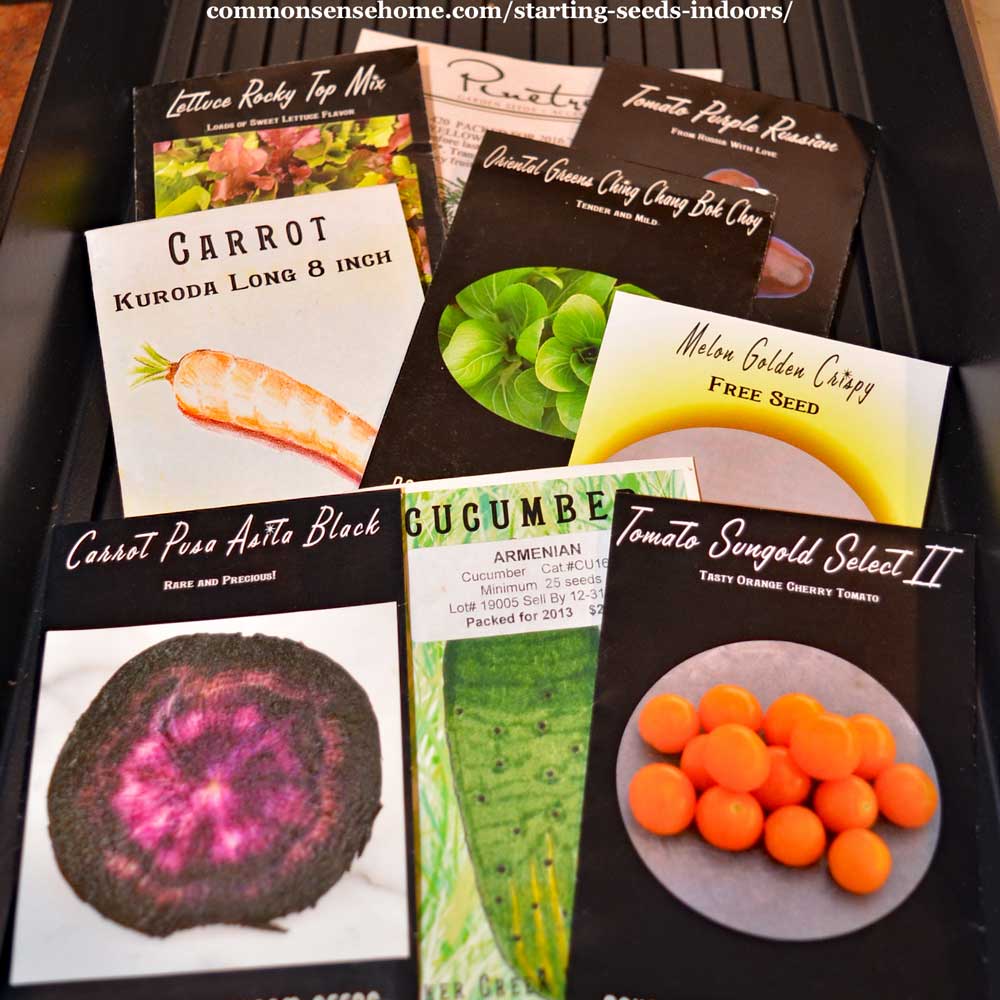
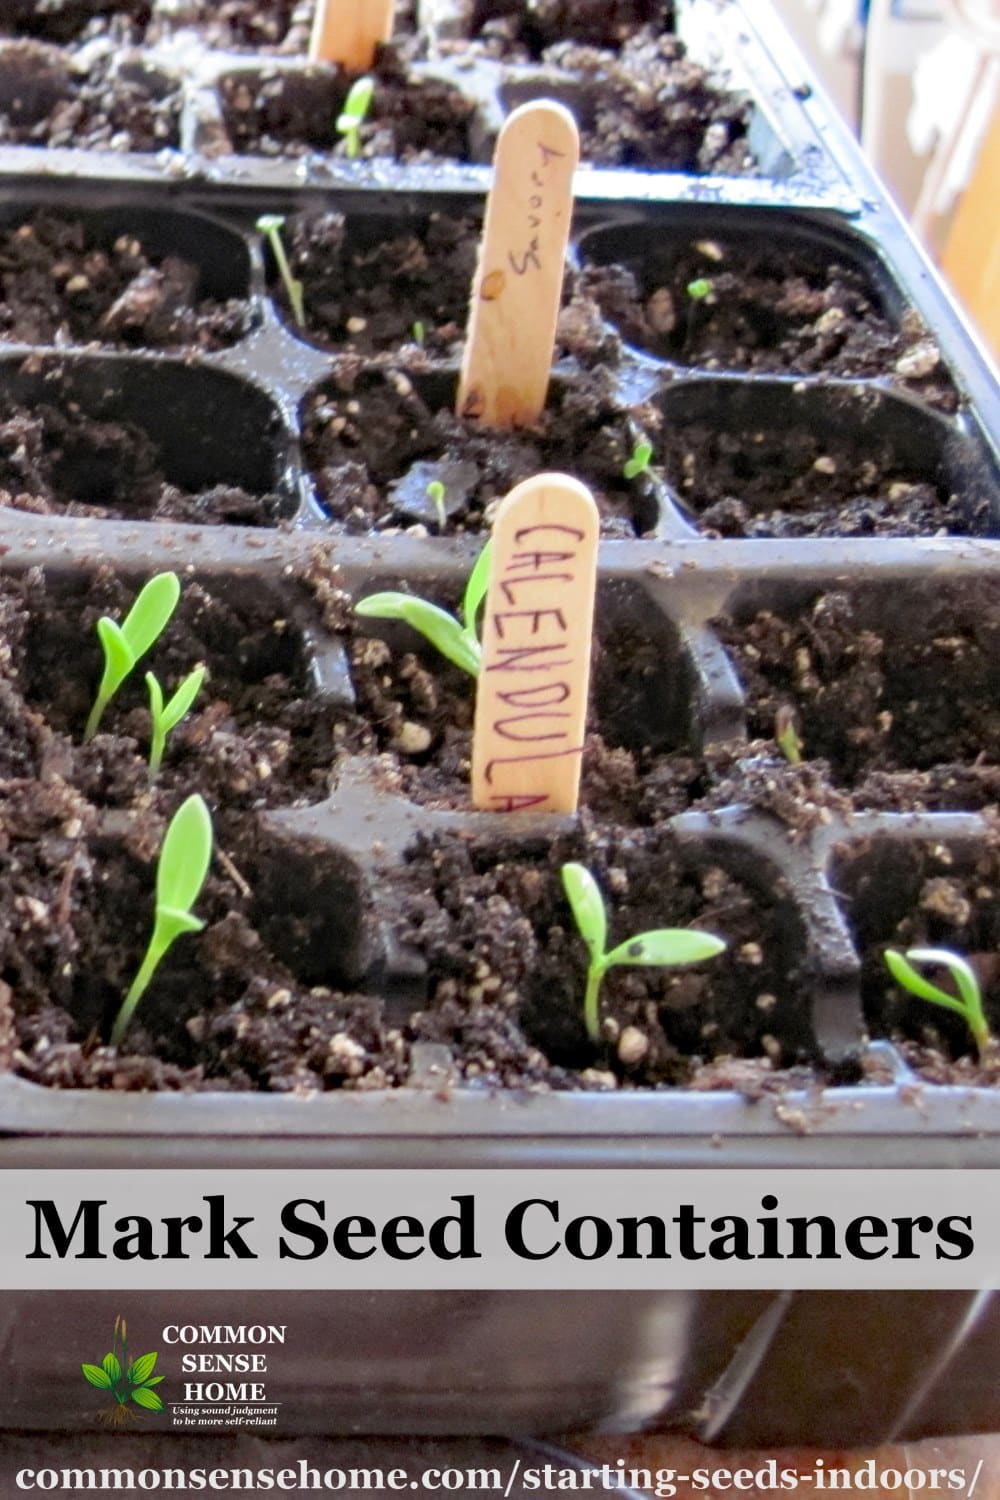
1. Plan Your Plantings, Label and Keep Records
Decide what you want to grow, and use your last frost date to determine when to start seeds indoors. See our Printable Seed Starting Calendar for a list of which plants to start indoors and which to direct seed in the garden. Seeds labeled “direct sow” are usually best planted right in the garden.
I keep a simple spreadsheet listing the variety planted, date planted, date when seedlings appear and some other basic information. You can print out your own copy from the post, “Free Gardening Journal Templates and Other Garden Record Keeping Tips“.
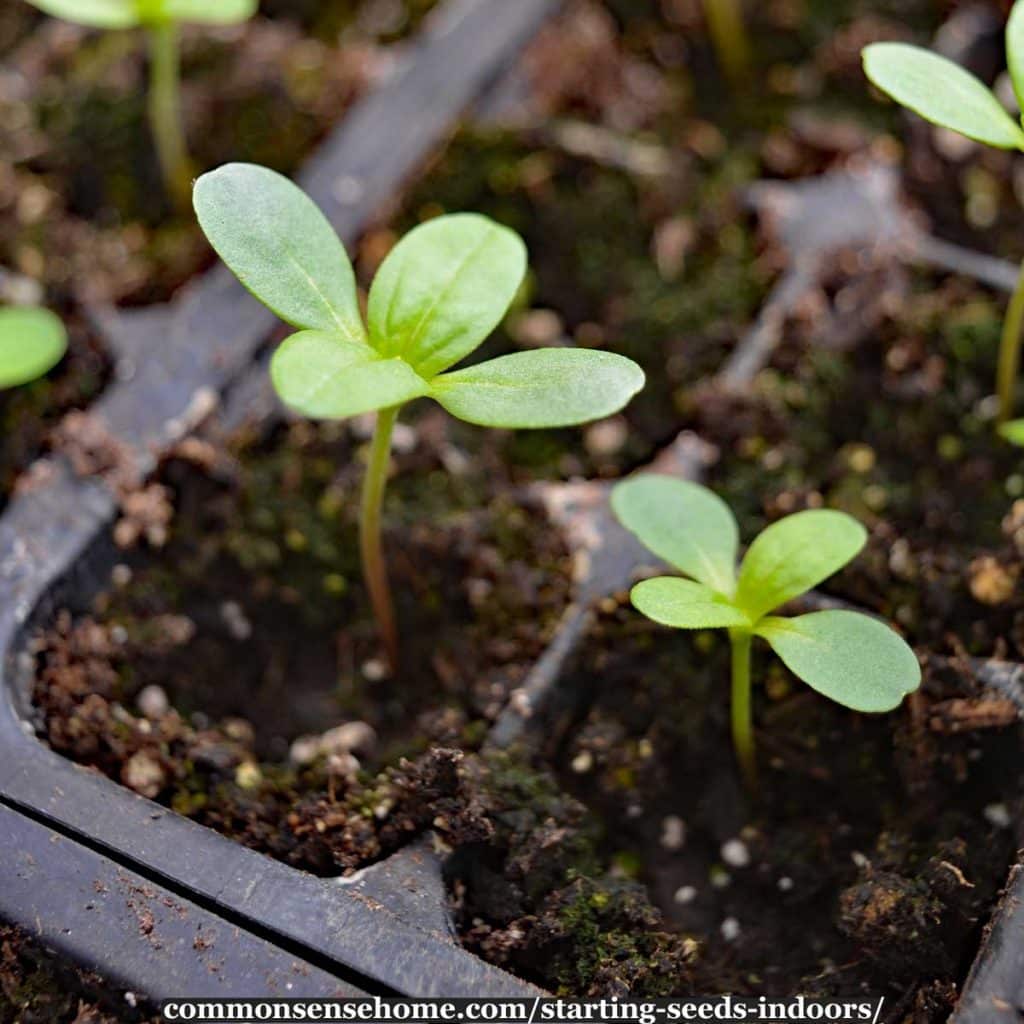
Mark your seedlings! I label all planting containers with craft sticks or other markers. It’s amazing how similar garden plants can look with they are tiny.
2. Choose the Right Seed Starting Soil Mix
Potting mix should be fairly light, but still hold enough water to keep seedlings moist. My current favorite potting soil is FoxFarm organic potting soil. It contains composted forest humus, sandy loam, sphagnum peat, earthworm castings, bat guano, and seagoing fish and crab meal.
If you’d like to make your own potting mix for starting seeds indoors, try a mix of one third each:
- soil or compost
- sand, vermiculite or perlite
- peat moss or coir from coconut hulls
If you’re worried about soil diseases, pasteurize your soil or compost by heating it to 180 °F (82 °C) in a warm oven and holding at that temperature for 30 minutes. If you have healthy compost or soil, don’t pasteurize. Overheating the soil damages it, so heat with caution.
Can you use garden soil for starting seeds indoors?
I wouldn’t recommend it. Plain soil doesn’t drain well enough, and seeds will tend to rot or the seedlings will be more likely to get fungal problems. You might also introduce weed seeds or diseases from your garden.
3. Choose the Right Seed Starting Containers
Most of my seeds are started in old cell packs or other reused nursery pots. My friends know that I start seeds indoors (sometimes I sell or trade my extra plants), so they save their pots for me.
I like reusing old pots because they are sturdy, have drainage holes, and fit neatly into the large seedling trays. I’ve seen plenty of ideas for homemade pots, but many of them seem too small (like eggshells) or too flimsy (like newspapers). Peat pots are often recommended because they “break down in the soil”, but in my experience they break down poorly and often stunt young plants.
Whatever you choose, make sure your pots drains well, and/or be careful not to overwater. Don’t reuse anything with potentially toxic residues. Deli containers are fine as long as you don’t leave seedlings in standing water. Don’t forget to place a drip tray under your seedlings.
Many times I plant directly in the garden from the 1 inch cells, but sometimes I “pot up” seedlings indoors. When I want larger transplants, I start seeds inside early and then transplant them one or more times as they grow. You can learn more about this in the post “How to Grow Tomatoes from Seed”.
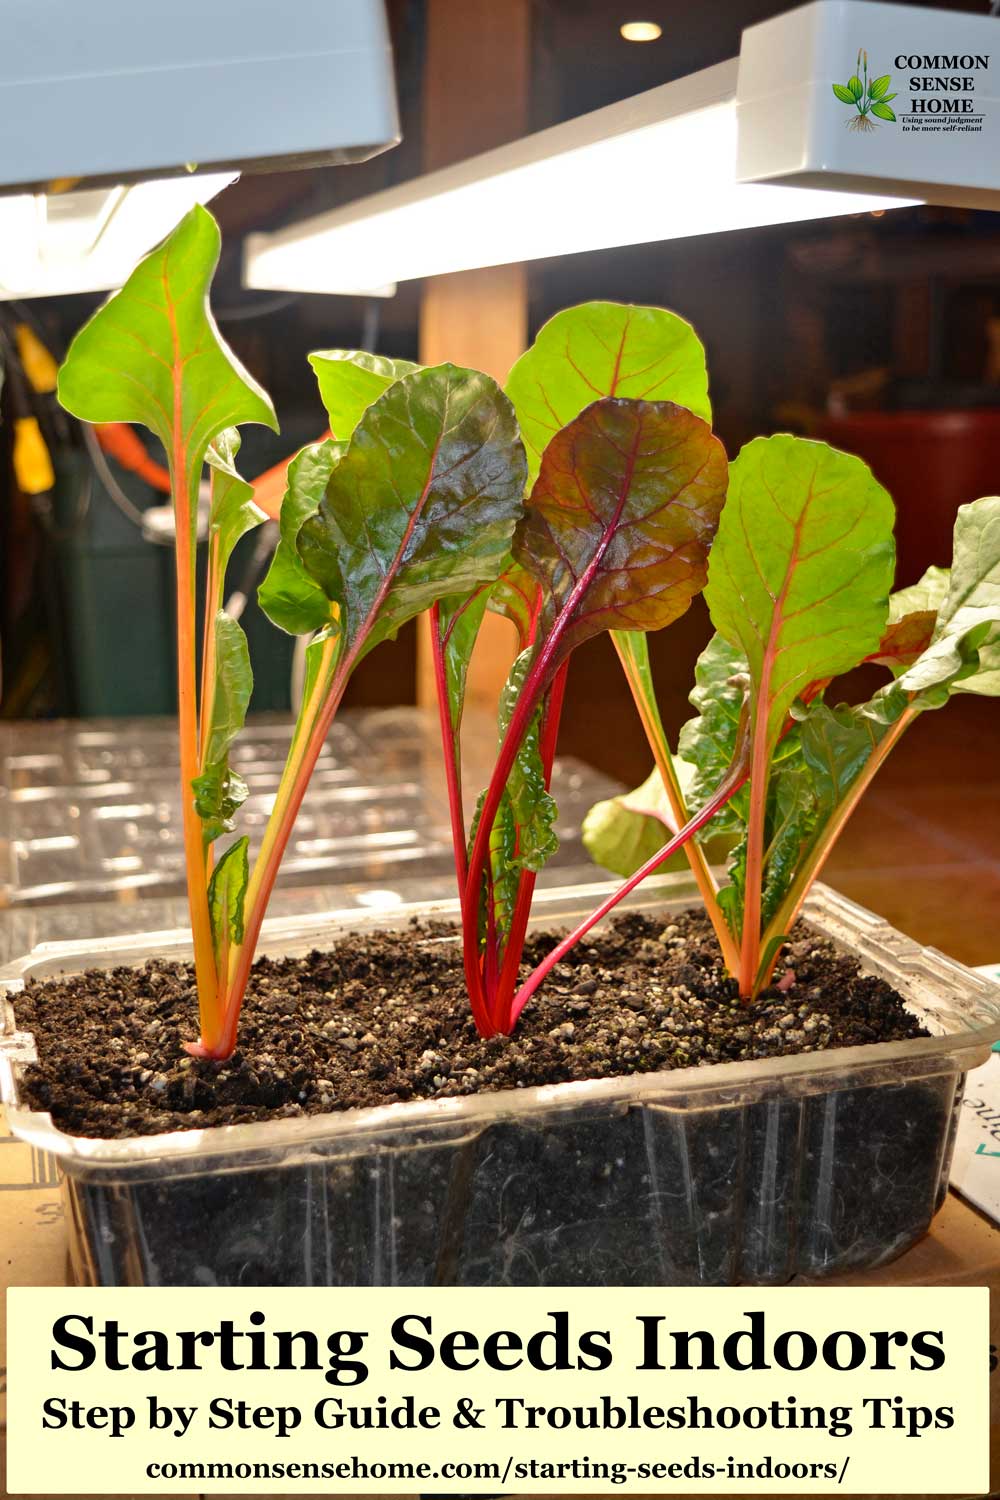
4. Provide Plenty of Light
When starting seeds indoors, make sure your plants get 16 to 18 hours of light each day. Turn off grow lights at night so they can rest. (Growing plants need sleep, too!) Plants do best when lights are kept close, about 3-4 inches above the seedlings. LEDs or fluorescent lights allow you to keep lights close to the plants without overheating the delicate seedlings.
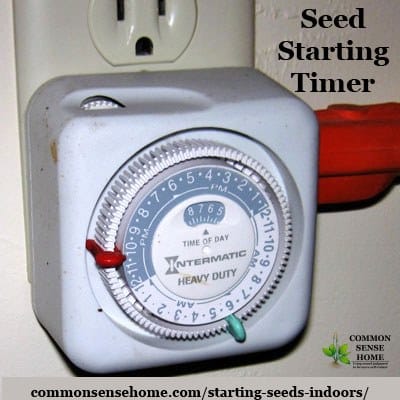
I use a simple plugin timer to turn our grow lights on and off each day. Without enough light, indoor seedlings will stretch towards available light. This makes them tall and floppy.
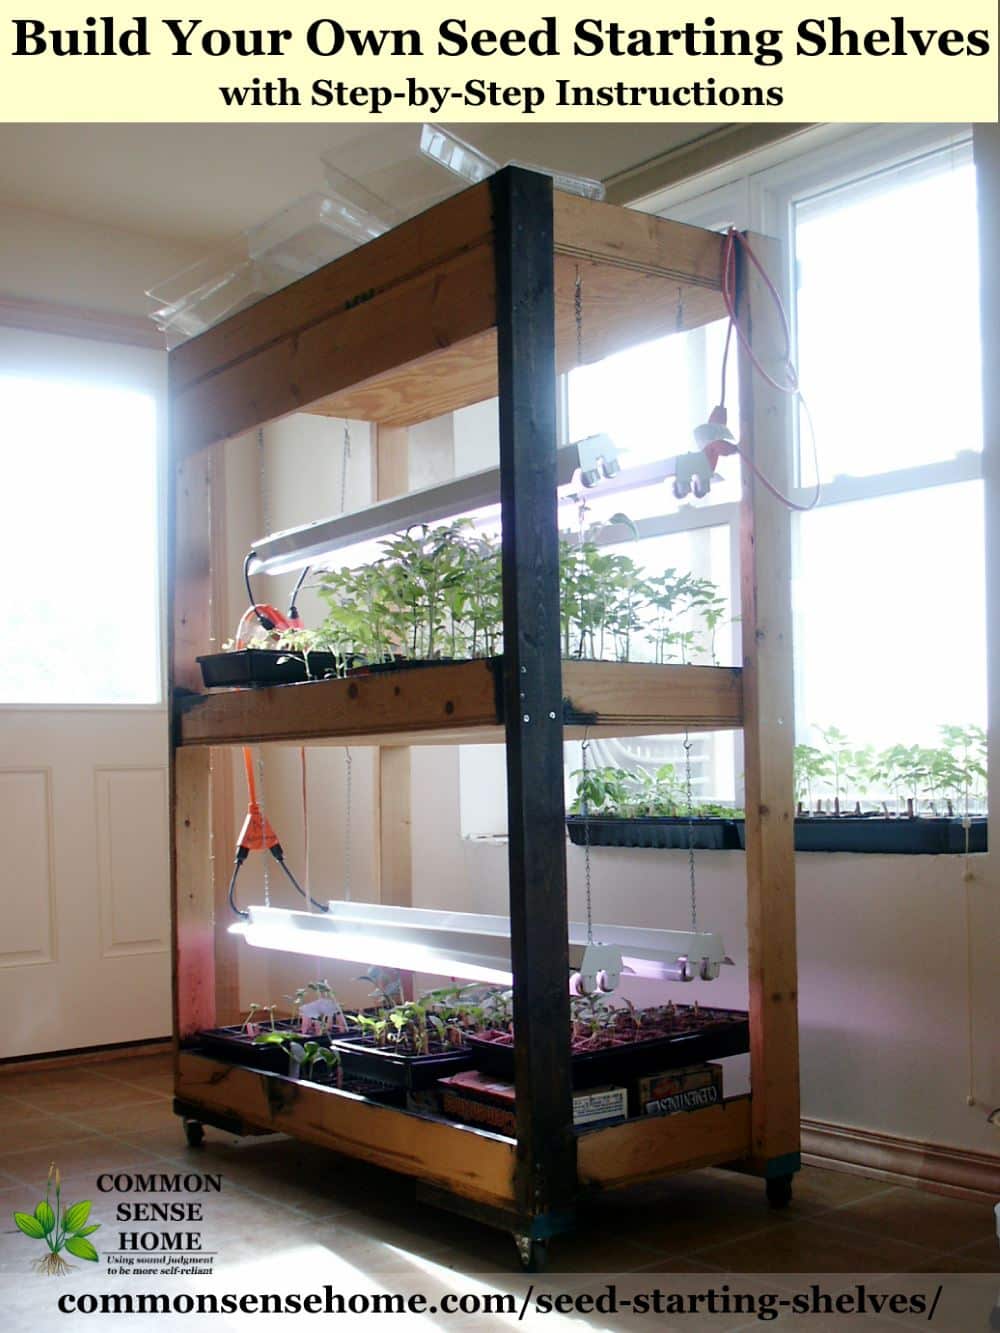
Several years ago, my husband built me a really nifty seed starting rack with lights on adjustable chains. You can get the plans for the seed rack here.
Do you need special plant lights to start seeds indoors?
Plant lights are great if you want to make the investment, but not absolutely necessary. I originally started with fluorescent shop lights with “plant bulbs”, and have now switched to LED grow lights. We tried LED shop lights, which did alright when the plants were tiny, but caused some leaf yellowing as the plants grew.
5. Keep Indoor Seeds and Seedlings at the Right Temperature
A little warmth helps your seeds to germinate. I’ve set seedling trays near the wood stove or on top of the refrigerator. A seed starting heat mat is convenient, because you don’t have to move your trays around the house. For a detailed comparison of germination rates at different temperatures, check out the effect of soil temp on sown seeds.
Once seeds germinate, most grow happily along at around 60-70 °F (15 – 21 °C). Keeping the area too hot or too cold will stunt seedling growth – or may even kill your seedlings.
Would you like to save this?
6. Cover Seed Trays to Improve Germination
Cover your seed trays with a plastic cover until the seeds sprout to trap moisture and improve germination rates. Because I reuse commercial cellpacks for indoor seed starting, they fit neatly into planting trays with matching plastic dome covers. (If you want to get fancy, some germination kits even come with lights built into the cover.)
It’s best to check your seedlings daily while you wait for them to sprout. If you see any signs of mold, remove the cover for a few hours to allow excess moisture to escape.
Once seedlings emerge, remove the cover to allow air circulation.
7. Plant Seeds at the Right Depth
Rule of thumb for planting: Plant seeds roughly three times as deep as the diameter of the seed. Seed packets should give specific instructions, but this is a good general rule. Some seeds need light to germinate, so they should be planted on the surface or only very lightly covered.
8. Provide Enough Water to Seedlings, but Not Too Much
Your indoor seed starting mix should be moist enough that it holds together when you squeeze a handful, but not so wet that water runs out when you squeeze it. Covering the trays should keep them moist enough until seedlings germinate.
Once you get your seedlings growing, water gently every few days. (Warm rainwater is great if you have it.) Between watering, I allow the soil to dry somewhat, but not completely.
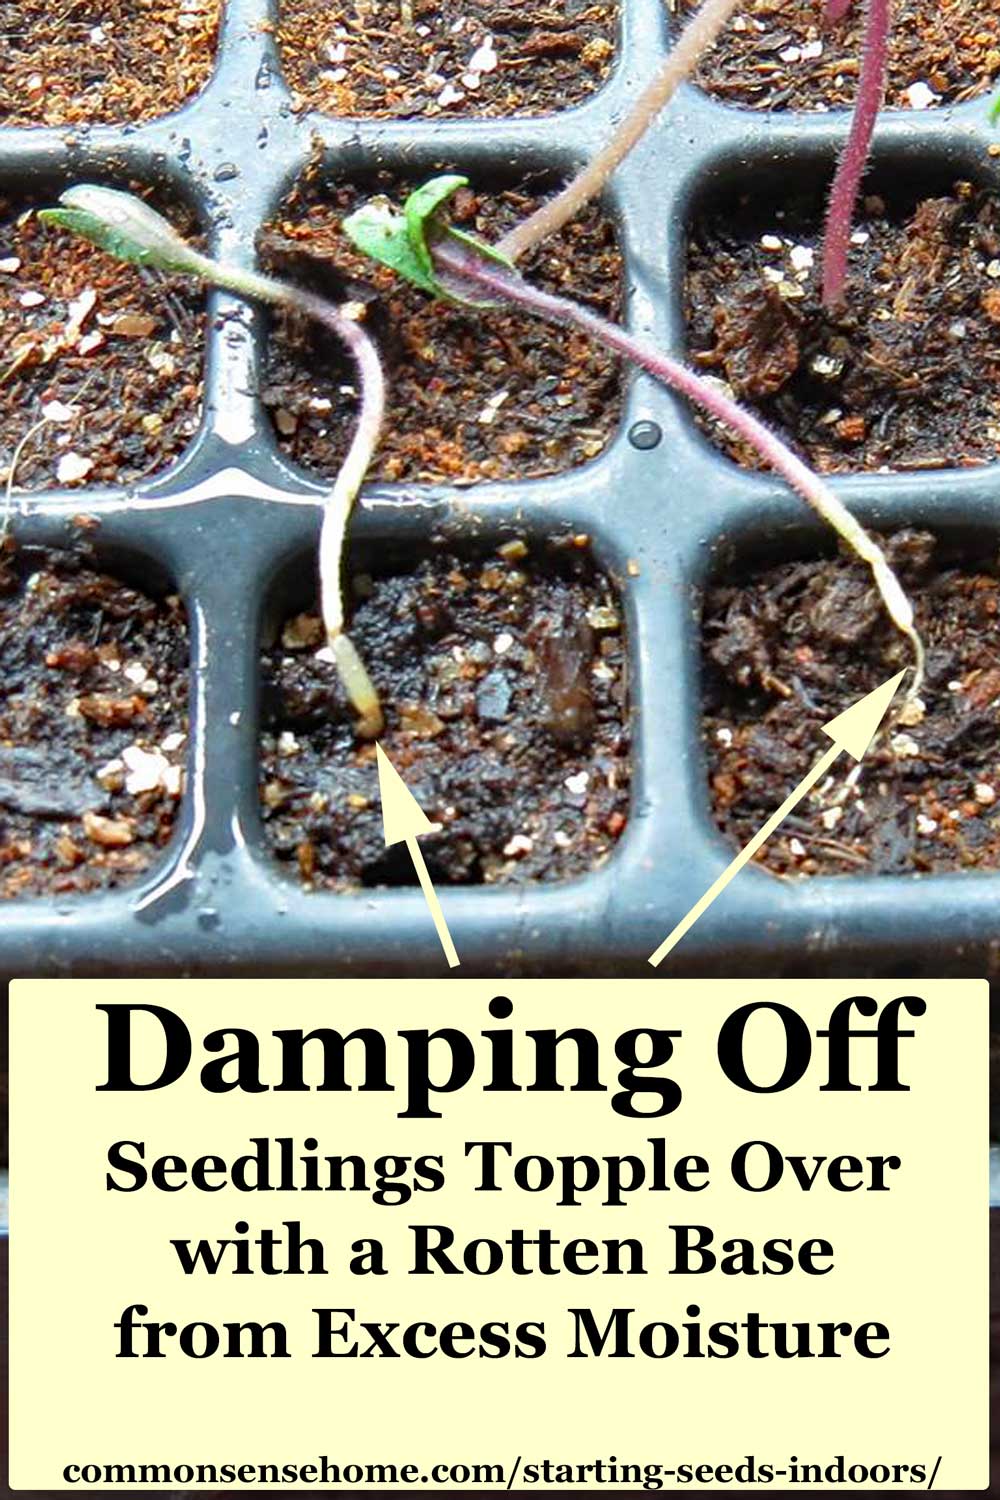
Soil should never be soggy! Moss, fungal growth or seedlings that tip over dead with a rotten base (damping off) are signs of too much water.
9. Provide Good Air Circulation and Movement
You may have noticed large fans in commercial greenhouses. These fans provide air movement to keep foliage dry and prevent fungal diseases. They also help strengthen the plant stems, because the seedlings must hold themselves upright in the light breeze.
If you have a small number of seedlings, gently stroking the plants several times per day can help strengthen the stems. With several dozen (or more) seedlings, a fan is much handier. We keep a standing fan on the same timer as the lights and have it oscillate across the seedling trays.
10. Feed and Care for the Young Seedlings
I like to use foliar feeds such as liquid seaweed fertilizer to provide nutrients to the seedlings. Other great gentle feeding options include compost tea or worm poo tea. EM-1 Microbial Inoculant is added to the water to introduce beneficial bacteria to the soil.
If seedlings become crowded, transplant to larger pots or transition to the garden. If you have more than one seedling per container, you can transplant to individual containers or use a scissors to snip off all but the healthiest seedling at ground level.
If plants fail to thrive, check water, light, temp and fertilizer levels.
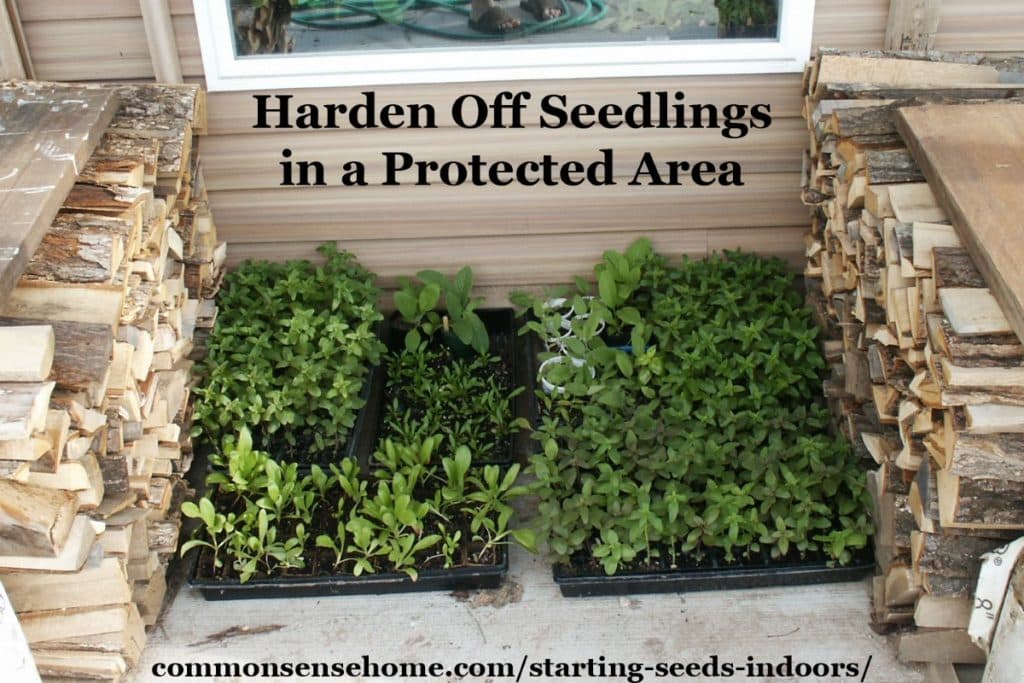
11. Harden Off Seedlings Before You Plant Outdoors
Plants started indoors need to adjust gently to outside conditions before going out in the garden. This is called “hardening off”.
When you’re close to transplanting time, place seedlings outside in a protected area, out of direct sun. Start with a couple hours outside, and then increase the time each day. Within three to five days, they should be ready for the garden.
Special Considerations for Starting Seeds Indoors
Pre-treatment of seeds. Some seeds require stratification (chilling before planting), especially wildflower seeds. Seeds with tough outer hulls may benefit from scarification (cutting or weakening the covering of the seed). Soaking is recommended for certain seeds. Double check specific planting recommendations if you’re working with a “new to you” plant.
Most plants transplant better when small. Vine crops such as cucumbers and squash are okay to start inside, but get less transplant shock if moved to the garden before they get their first true leaves. In general, most plants have less transplant shock if they are moved into the garden before their roots start to circle in their pots. Tomato plants are an exception, as they will sprout new roots from their stems when planted deeply. See “Grow Tomatoes from Seed” for more information.
Watch out for kids and pets! I lost a tray of seedlings in my kitchen to a curious toddler, and another tray of seedlings to a curious cat. Protect your plants.
Our Indoor Seed Starting Setup
Our basement was designed so that it could be used as an apartment for aging parents, so I have a kitchenette between my root cellar and the door to the attached greenhouse. Since we are currently without added housemates, it’s my gardening area. I have water at the ready and my mess is contained quite nicely.
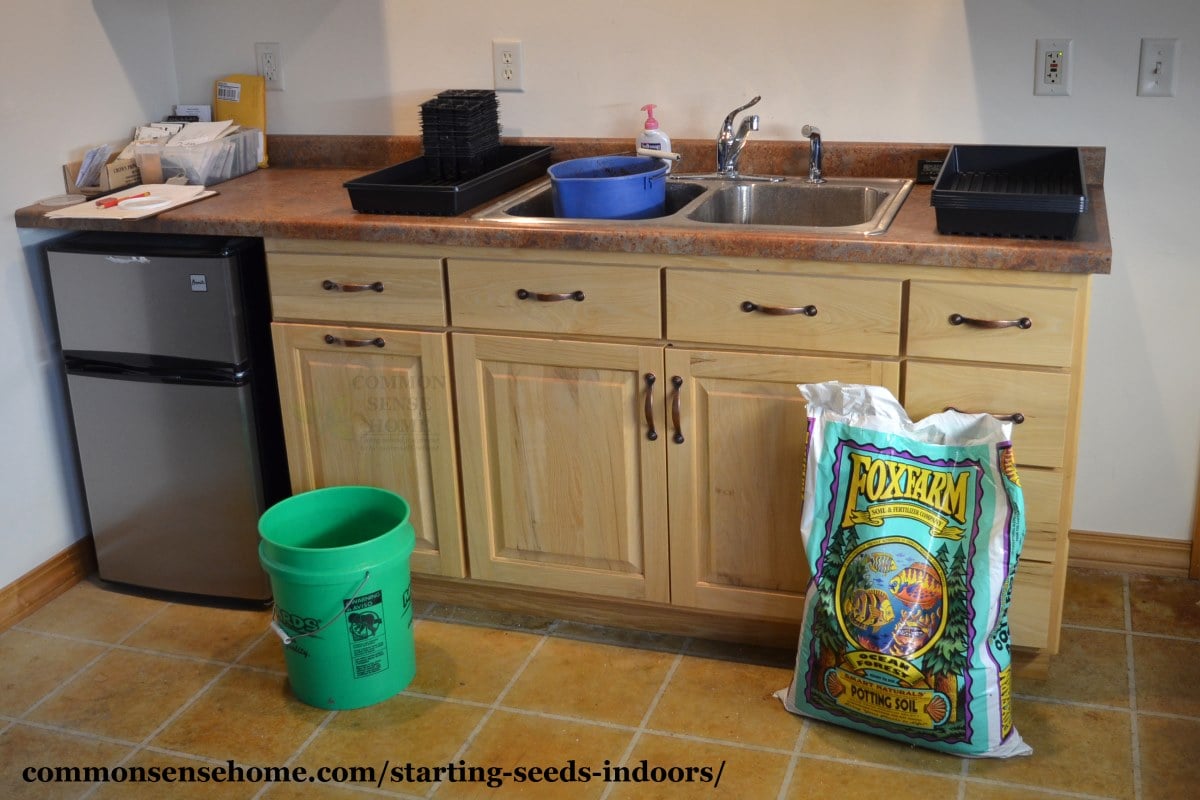
Once the seeds go in the planting containers by the sink, I set up seedling trays on my seed starting shelves. From the seed starting shelves, the seedlings graduate to one of our greenhouses. Then the go to a cold frame or other semi-protected spot to harden off, and finally out to the garden.
If you have specific questions about starting seeds, feel free to drop me a note and I’ll see if I can help.
Need More Gardening Ideas?
We have over 100 gardening articles on the site, all listed by category on the Common Sense Gardening page.
They include:
- Plant Hardiness Zones and Microclimate – Creating Your Best Garden
- How to Start a Garden – 10 Steps to Gardening for Beginners
- Small Garden, Big Yields – 10 Tips for a Great Harvest
Originally published in 2012, last updated in 2019.
We live in almost the same region (I’m two hours south)! Do you have any recommendations as to when is a good time to start indoors? I have a new grow light and heat mat setup that I’m antsy to use…but it’s not even February! The last few years I followed the seed packets instructions or what I’ve read in books or online but it never seems to make for a long enough growing season. I was thinking of starting the onions and leeks this weekend but just am not certain how soon is too soon!
Have you grabbed the garden planning kit for subscribers that includes a seed starting calendar? You can sign up at https://commonsensehome.com/subscribe/
There’s an Excel spreadsheet where you can plug in your last frost date and work back from there.
I’m finishing my seed order today and plan to start up my onions as soon as they get here.
I remember the first time we did seed starting for a big garden, we were so excited to finally have a huge yard after years of apartment life, we failed to properly label things ~ LOL ~ you’re not kidding when you say they look ridiculously similar at that tiny stage! Learned that lesson really quick :-p
After my seeds germinate how soon should i remove my heat mat ?
Once your seedlings are up, you can remove the heat mat. Warmth typically stimulates germination, but the plants will be stronger when grown in cooler soil.
I have been looking into replacing the fluorescent shop lights I’ve been using for seed starting with LEDs. The LED light you linked to is one I’m looking at. My seed starting set up was tall metal wire shelving (4 shelves that will hold 4 flats each). Each shelf had two 2-light fluorescent shop lights (each fixture had a cool bulb and a warm bulb). We recently moved and I off-loaded all of my shop lights, but I still have the shelving units. Would I use two of these LED fixtures per shelf to replace the two 2-light shop lights or do these lights have more coverage? For example – could I use one for each shelf? All of the info I’m finding is related to growing marijuana in grow tents so I can’t tell what coverage/wattage/etc… is appropriate for vegetable seed starting in this context. Any feedback would be greatly appreciated!
Thanks!
We just switched the LEDs this year, and I can put four of the trays on my shelves, too. I think two of the square LED units per shelf will give enough coverage, but I’m going to keep an eye on plant growth and watch for signs of light stress. We should start planting early next week, so I’ll have a better idea in March.
My seed starting attempts last year were a total flop. First I didn’t water them enough, then I watered them too much…and the cats don’t help anything. I did manage to transplant some of the tomatoes, but everything else went on the compost pile. I have only one window in the house that gets enough sunlight, but your set-up with the grow lights is beautiful. I’ve considered putting up a small greenhouse too. I guess it’s time to make a decision and get some seeds planted for this year. 🙂
I made plenty of mistakes in my early years, too. Mom always started plants indoors, but helping someone do it and doing it yourself are two different things. Back when I was a young bride, I set my some of my first flats outside in full sun – and promptly baked them all. I’ve also overwatered, underwatered, had them tipped over by cats (twice) and toddlers, been infested by whiteflies (bad potting soil), used Miracle Grow potting soil and stunted all my plants – you name it, I’ve probably done it. But each time I learned something, and each year gets easier.
Yesterday I went on a planting spree and filled five flats with all sorts of tomatoes, peppers, flowers, greens and herbs. It’s a little early for some, but with the greenhouses I can push a season a little. Each year is a new chance to start again.
Plantei ema semente urucum. ela estava bonita. Mas quando replantei . Pronto! Ela morreu. O que será que aconteceu? Obrigada!
Se a planta morreu , você terá de tentar novamente. Se você tentou plantar directamente para o exterior depois de crescer dentro, que é provavelmente o problema. As plantas precisam de ser ” endureceu off” antes do transplante . Coloque a planta do bebê fora em uma área protegida fora do sol direto . Deixar que um curto período de tempo em primeiro lugar, e , em seguida, um pouco mais de tempo a cada dia , até que esteja fora para a maior parte do dia . Então é mais seguro para o transplante para o jardim.
I used google translate, so I hope this makes sense.
I just ordered one of these. Dial Seeder Adjustable Garden Sowing Seeder – Flower, Plant, and Vegetable Seed Spreader
I can’t wait to get mine. You should get one and try it out. It is a dial type that adjusts to the side of the seeds. You put the seed inside. Let me know how it works for you. Mine hasn’t gotten here yet.
It’s a seed planting tool.
just a tip that may help , I found that soaking the seeds overnight and then planting them . and cover (not tightly) with foil for about 7 days till sprouted) BUT the most important thing is I use orchid pots that have have holes for air on the sides. the same for basil , they just don’t get to wet , as regular pots can do !
You mention “hardening” plants. As i beginner I have no Idea of what you mean, can you explain please?
Mary, when you start plants inside, they need a gentle adjustment period before moving out to the garden full time. This is referred to as “hardening off”. To harden off seedlings, I place them outside in a protected location on a nice day, first for a few hours, then longer as they have a chance to get used to the change. Make sure they are not is strong direct sunlight. This can bake little seedlings very quickly. Indirect sunlight out of strong winds is best to start. I usually move mine out to my cold frame, and then lift the lid to expose them to moving air and such.
Thank you for the detailed article on Seeds Starting. Shared it on our Facebook page … the detail is fantastic!
Hi, Have spent last hour reading through your experiences and suggestions. Have enjoyed my reading -Thank you.
In India,when farmesr have to plant tiny seeds, they mix it up with sand so they become easy to handle. A handful of this sand mix would in effect contain only a small amount of seed and is easier to spread.
Thank you. I have done this in the garden, but inside I’m never sure how much I want to plant, so I hate to premix too much seed.
I love to plant funky stuff…different varieties and different colors. where are you located? Im in estacada oregon…and it seems still too cool to start. We are starting from scratch this year…just buying this house on an acre. We are excited. We need to get out there and build our garden boxes. Thanks for the posting…alot of useful info