Harvesting Walnuts – How to Pick & Store Walnuts for Freshness
This post may contain affiliate links. Read my full disclosure here.


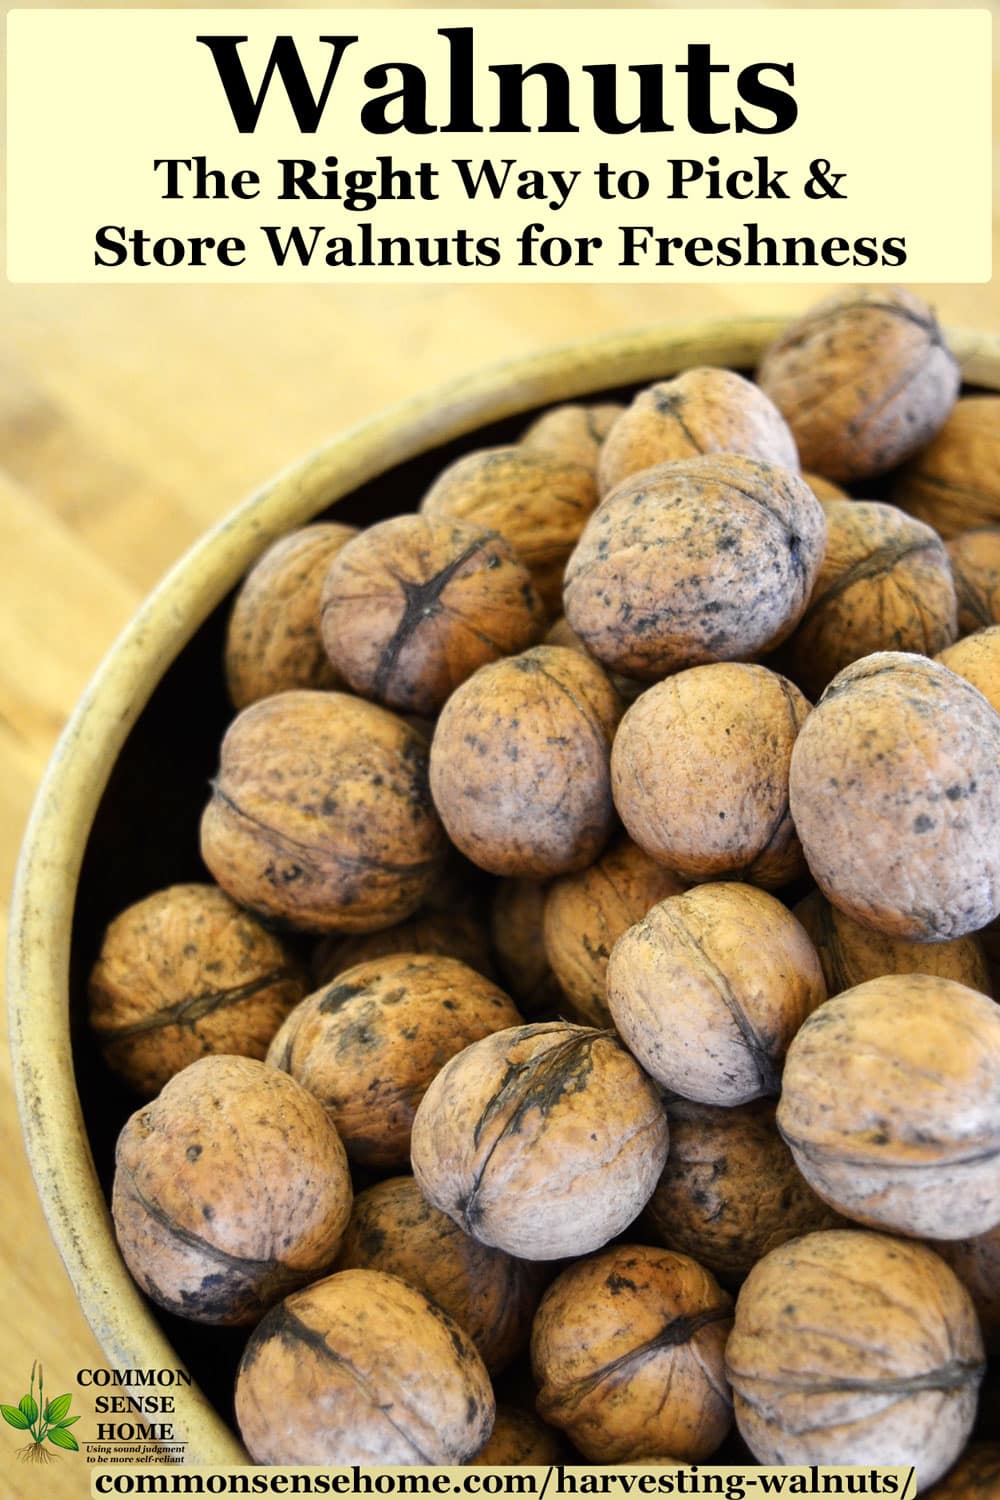
Harvesting walnuts is a part of our fall routine most years. We don’t have walnut trees yet, but our neighbors have black walnut trees and English walnut trees. I normally use the black walnuts for their hulls to make black walnut tincture, and use the English walnuts for their nut meats.
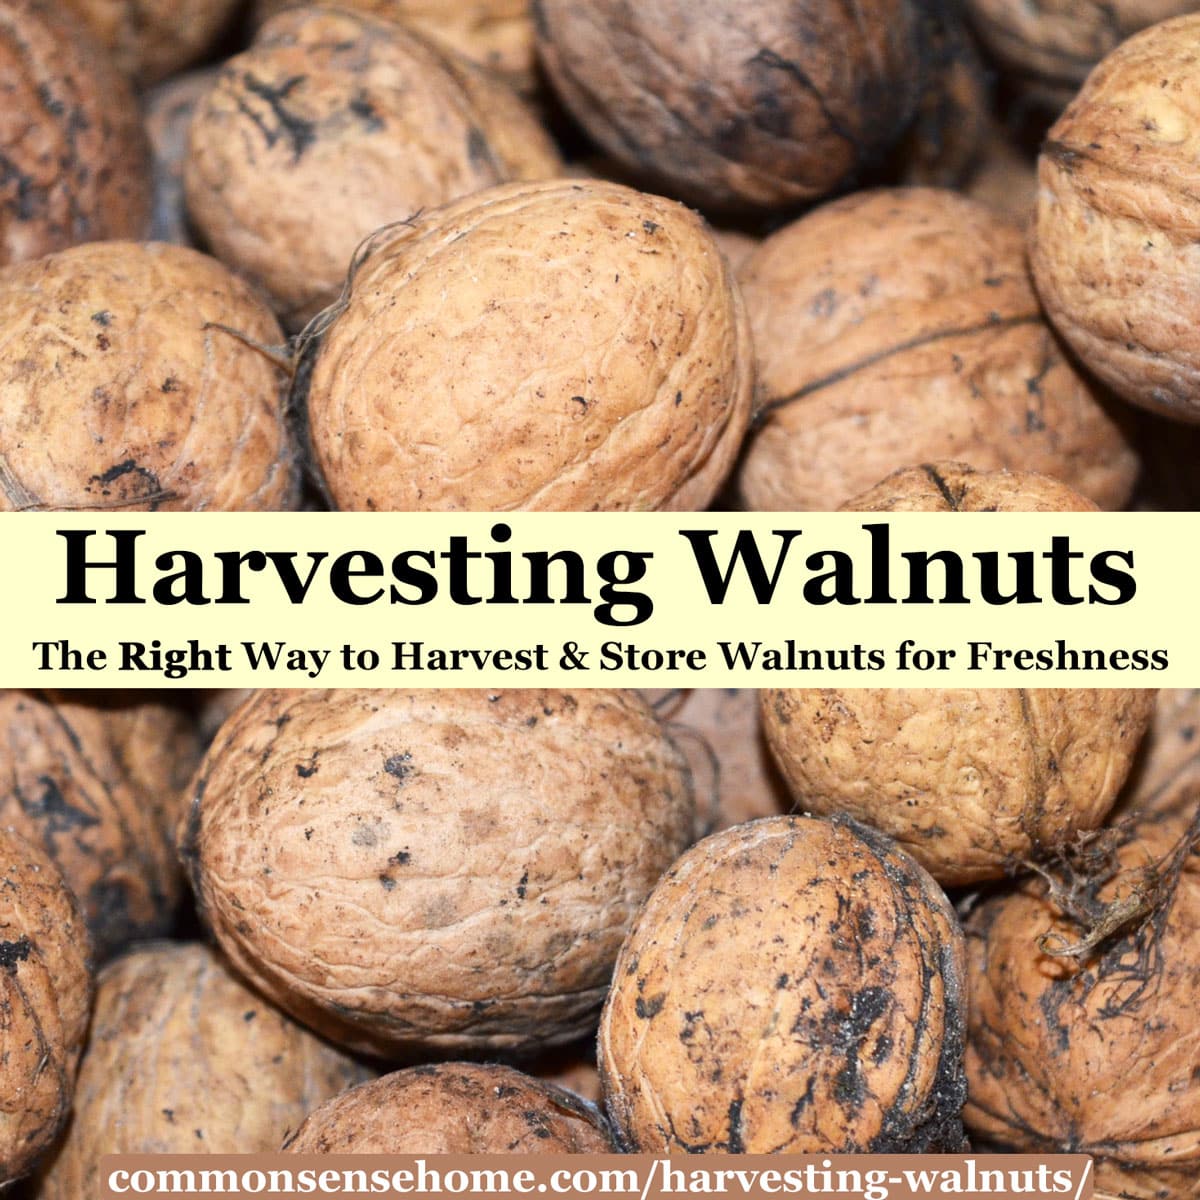
Both types of walnuts have a tough green outer hull, but the hulls on English walnuts usually split open and are easy to slip off. Black walnuts require more effort to hull, and their shells are thicker and nut meats smaller.
English walnuts have thinner husks and shells, and are easily cracked with a lever style nut cracker. In this post I’ll talk about harvesting English walnuts, picking the fresh nuts and drying them for storage in the shell. We’ll also cover the best way to store nuts out of the shell.
Note: The maple candied walnut recipe has moved here.
Harvesting Walnuts
In the fall of 2014, I got a phone call from one of my neighbors – “Would I like walnuts?” It turns out that other neighbors, relatives of theirs, have two beautiful 89 year old Carpathian walnut trees in their front yard, both of which produced a bumper crop that year.
Those trees were sent directly from the Carpathian mountain area all those years ago, at a cost of $1 each, which was big money back then. They came with an apology note about how expensive they were. (I heard this story from the folks who owned the trees as we picked nuts. The farm is still in the same family, and the trees were purchased by the grandfather of the current owner.)
We were blessed with many buckets of nuts, enough to share with family and friends. I had to learn how to process walnuts.
Since then, we get called when there are excess nuts. Some years they don’t have any to spare, but luckily, walnuts can store a long time in the shell. With what we store from year to year, I haven’t had to buy walnuts since 2014.
Gathering the Nuts
Harvesting walnuts (in this case, harvesting English walnuts) is simple. We gather the fresh nuts in a bucket after they fall to the ground. Because we’re gleaning at the neighbor’s place, we only pick up fallen nuts.
If you were harvesting English walnuts from your own tree, you could go ahead and grab nuts off the lower branches as soon as the green husks start to split open. Wear gloves if you don’t want to stain your hands dark brown.
Avoiding Bitter Walnuts
Walnut husks are extremely high in tannins, which are bitter in flavor. The longer the hull stays on the walnut, the more bitter the nut inside is likely to be. In the book “The Resilient Gardener”, the author notes how she was able to gather and use nuts in her area that others avoided “because they were too bitter”. By gathering promptly as they fell, hulling immediately and curing, she quickly had a stockpile of free, delicious nuts.
As we sort nuts, we set aside any that have stuck-on blackened hulls, along with undersized nuts and damaged nuts, for animal consumption. (The chickens don’t seem to mind the bitter flavor.) Our chickens LOVE walnuts, and the walnut shells act as grit.
The video below shows the walnut sorting process. (Make sure ad blocker is disabled for video to play.) We remove the hulls and moldy nuts are discarded.
Walnut Harvesting Tools
For several years we harvested walnuts by hand, but this year we tried a ball style walnut harvester (similar to the Garden Weasel Medium Nut Gatherer). Holy smokes did that speed up picking! There are similar nut pickers sized for larger nuts, and even powered nut harvesters.
The video below shows the walnuts in their green hulls, and harvesting walnuts with a rolling nut picker.
Drying Walnuts for Storage
I was instructed by the tree owners to spread the fresh walnuts out in a warm, dry, shaded place to cure for at least a month before using them. I’ve seen mixed recommendations online on how long to dry. I suppose it depends a lot on your conditions.
The goal of drying walnuts for storage is to reduce the moisture within the nuts to prevent mold growth. When properly dried, the nuts inside should have a nice “snap” and not be rubbery.
At this point, the walnuts should hold for up to three years in the shell in cool, dry conditions (if you don’t eat them all first). So far I’ve stored my fresh walnuts for over two years at a time with no loss in quality.
Sometimes,I spread my walnuts out on the mesh shelves of my greenhouse to dry. (I did find that the mice got a few of them when I used this option.) Once I have them spread on the shelves, I cover them with burlap to keep out the light.
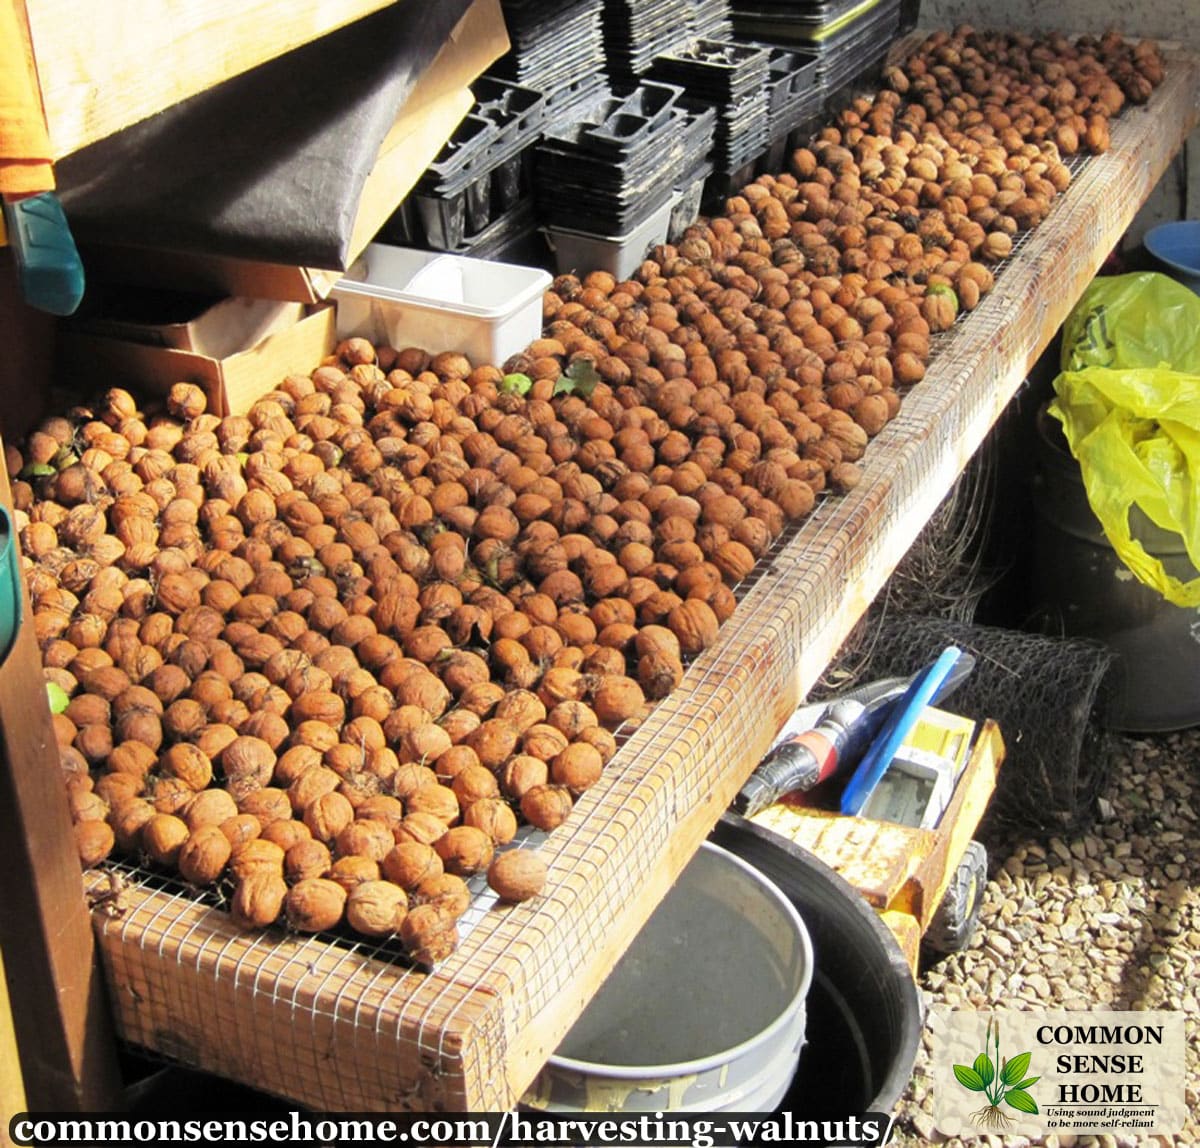
Because of the mouse risk, I usually dry my walnuts in trays in the finished basement or in the living room. I spread the walnuts out in shallow cardboard boxes, or in my black planting trays that I use for seed starting.
Once the fresh walnuts are dry and cured, I store them in the shell. We keep ours in five gallon or one gallon buckets with lids. (Mice do love walnuts, so make sure any storage container you use is rodent proof.)
Would you like to save this?
Gamma lids make it easy to get into the buckets as needed. Store your walnuts in a cool, dry location out of direct sunlight. Don’t store the buckets in the root cellar. We tried this (thinking the buckets would protect the walnuts) and had issues with nuts getting moldy inside.
Easy to Use Walnut Cracker
For cracking our monster nut harvest, I was lucky enough to find a great deal Reed’s Rocket Nut Cracker at the local kitchen store. If you do any serious volume of nut cracking, you need one of these nut crackers.
If you have a smaller nut or odd sized nut, like a hazelnut, just fold a bit of dish towel and tuck it in the cracker with the nut to make sure it fits tight enough to crack. (Looking for a black walnut cracker? Try this heavy duty nut cracker instead.)

This cracker saved so much time and so much easier to use than our old “pincer” type cracker. I got one for our neighbors who shared the nuts, too. To avoid flying pieces of shell, we covered the cracker with a cloth as we cracked. (I cut up an old, worn bath towel, which we use in place of paper towels in the kitchen.)
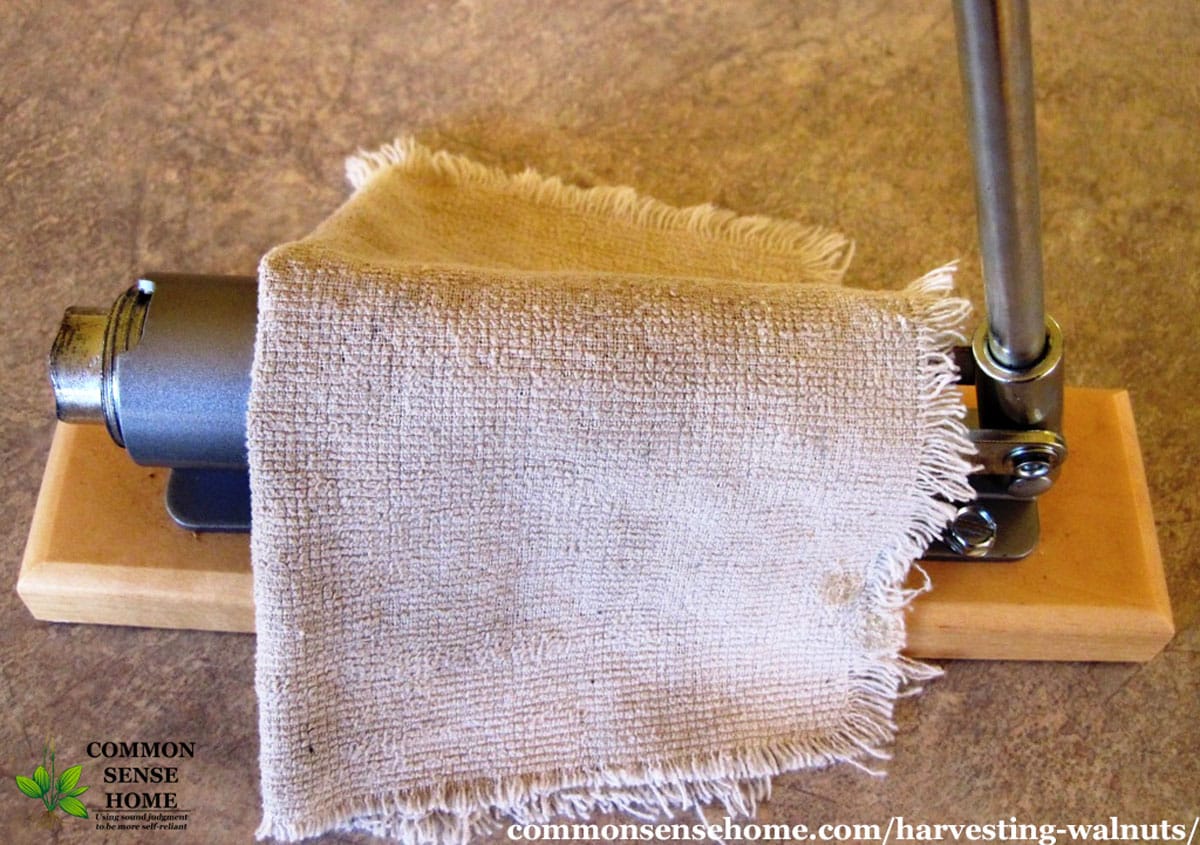
The nuts come out neatly, too, often in clean halves instead of bits and pieces. It’s rather fun to use, too.

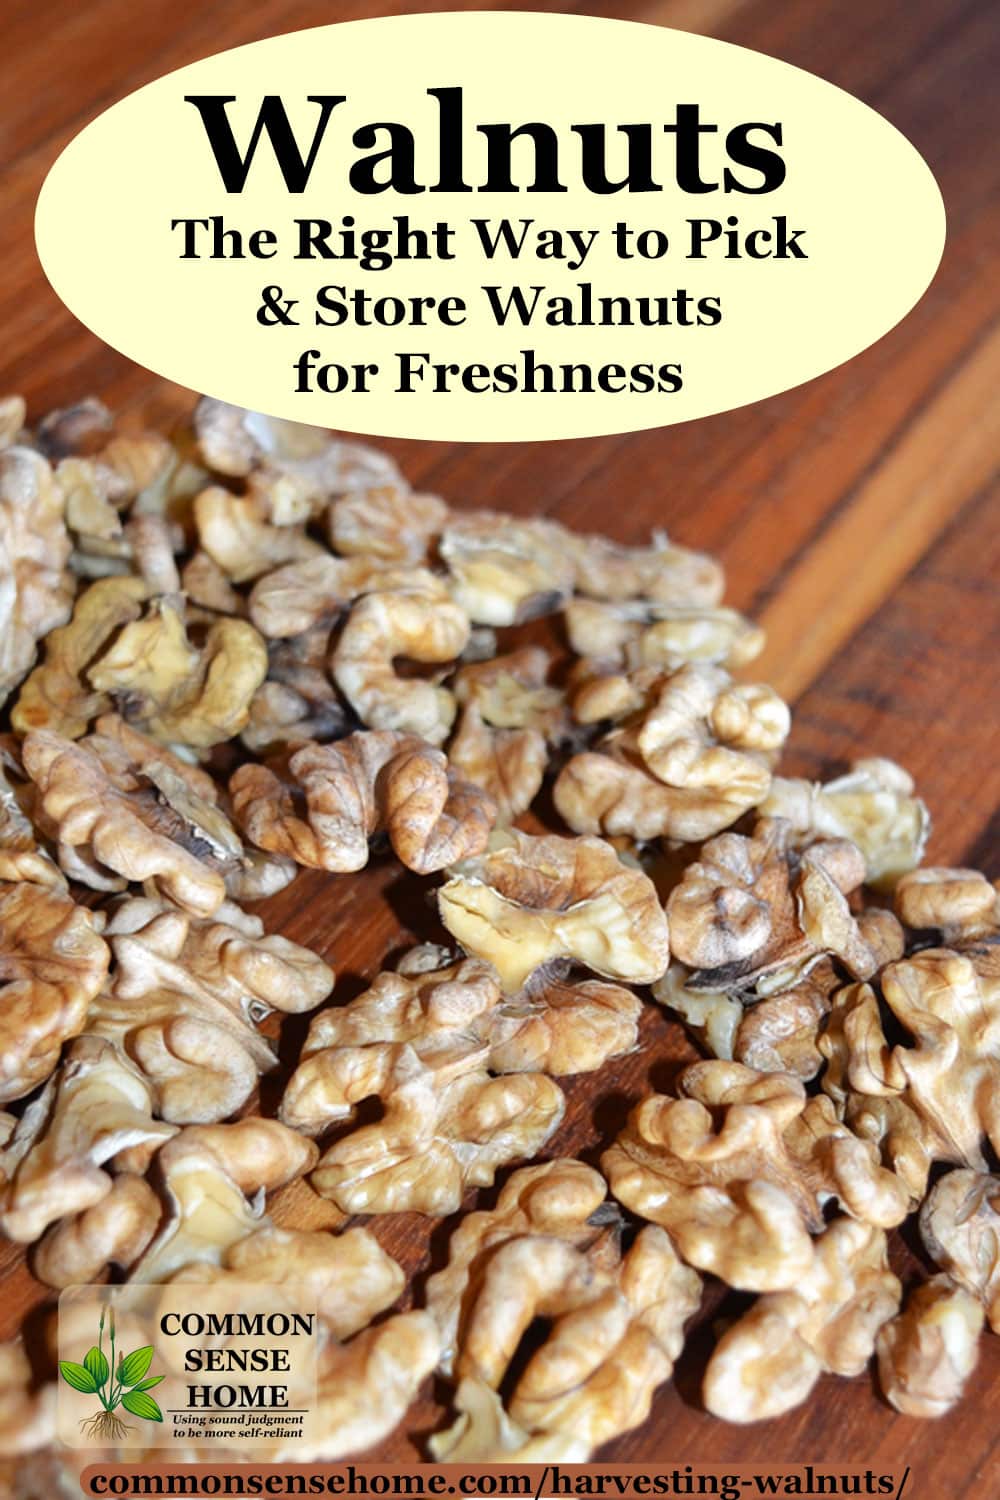
The Best Way to Store Walnuts
As mentioned above, fresh walnuts, properly dried, will keep for three years in the shell. The shell acts as a natural protective barrier. This is how I store most of my walnuts.
Once shelled, the oils in walnuts quickly go rancid. You should either use freshly shelled nuts right away or store them in the refrigerator or freezer for best quality. In the fridge they should keep for six months, in the freezer, safely a year.
You may be thinking, “But they don’t store walnuts cold at the grocery store.” Once you’ve had a chance to compare the taste of freshly shelled versus pre-shelled, you’ll know that they probably should.
Many stores do turn over product fairly quickly, but store nuts are, in general, not optimally processed and not terribly fresh. It’s cost prohibitive.
It’s safe to eat raw walnuts, but we usually take the time to make Crispy Walnuts.
What are Crispy Walnuts?
Crispy walnuts are raw walnuts soaked in salt water and then dehydrated until crisp. Soaking and dehydrating removes excess tannins, phytic acid and enzyme inhibitors.
Maybe you’ve encountered a sore, puckery mouth after eating several walnuts? That’s the tannins.
Some people also get a “heavy” feeling in their belly after eating nuts. That’s the enzyme inhibitors. They’re great for keeping the nuts from sprouting too soon, but can make the hard to digest.
After the soaking and dehydrating, the walnuts taste almost like roasted walnuts. No more pucker mouth and no more heavy gut.
When we want to get nuts ready for eating, we shell a bunch of nuts and process them into Crispy Nuts ala Nourishing Traditions.
Crispy Walnut Recipe
To make crispy nuts, mix together in a non-reactive bowl:
4 cups walnuts (also works with other nuts)
1 tablespoon sea salt
Enough water to cover
Stir and leave on the counter overnight, or at least 7 hours. Drain well in a colander and dehydrate at 125°F for around 24 hours, depending on how crispy you like them.
Store them in the freezer to prevent rancidity. Don’t forget to date and label them. They will keep for months. For even better quality, vacuum seal them.
Using Walnuts
Walnuts are great as a snack, in granola or hot cereal and for baking. There are number of recipes featuring walnuts on the site (you can view our entire recipe listing here). Some of my favorites are brownies, coconut oil fudge and cranberry walnut pie. Maple candied walnuts are delicious and make a great gift.
What are your favorite ways to use walnuts? Do you have any walnut harvesting tips to share? Leave a comment and share your thoughts.
Originally published in 2014, last updated in 2019.
before clicking on this link , the words said something about how to tell you’re buying fresh nuts. but that was not in your webpage.
I have no idea what link you clicked or where it was, as I have no control over links that are not on my site. I never talked about buying nuts in any version of the article (it has been updated over time). If you are purchasing nuts, buying them in the shell and making sure the shell is intact improves your odds of freshness. If they were improperly cured or the shell is damaged, they could still be bad.
Once walnuts are out of the shell, the fats in them start to spoil quite quickly. Most bags of nuts you find in the grocery store have some degree of rancidity from sitting around. You can usually smell it when you open the bag. They don’t smell rotten, just not fresh. Airtight packaging helps. Purchasing through sources that have high turnover rates may help.
do these promesses work for black AND English walnuts?
This article talks about harvesting English walnuts, picking the fresh nuts and drying them for storage in the shell. We also cover the best way to store nuts out of the shell.
Black walnuts also need to be cured for storage in the shell, but before that happens, you need to remove the husk. That is a separate process and is not covered in this article.
I occasionally get a black nut meat. I have eaten a few and they don’t have a bad taste. Any suggestions or warnings ?
Dark nut meats are primarily a cosmetic issue more than a safety issue. It may be a harvest/storage issue, or simply the particular tree. (If it’s only an occasional nut, then it’s probably harvest/storage.) You’re seeing oxidation or juglone staining, resulting in a dark colored nutmeat.
From the article “Why does the walnut kernel darken?“:
I’ve just planted Manchurian Walnut trees – is the process the same for them?
I’ve never worked with them, but it looks like processing them may be more similar to dealing with black walnuts. The husk is thicker than a Carpathian walnuts husk, and the nuts more difficult to crack, though not as difficult to crack as black walnuts.
I hunted around a bit and couldn’t find specific guidelines, but hulling and drying is needed for every nut that I’ve come across so far, so it seems like a good option. Maybe check with the nursery where you bought them to confirm? Odds are it will be several years before you get a harvest.
Thank you so much for the information! I learned a lot from this article. I didn’t know about the salt water soak and will try that asap. I really appreciate all that you do.
This post is extremely informative! We currently live in Germany and found out we have an English walnut tree. I had no idea you had to cure them first. You said for curing them they needed to be in a warm, dry, shaded place for about a month; Is a dark place okay, such as a basement? More specifically, the laundry room as it would be warmer from the occasional dryer usage? I wasn’t sure if they should still get a little indirect sunlight or not. Thanks in advance!
Dark should be fine, as long as there is good air flow and warmth.
We’ve run into trouble when we tried to stack them a little. We tried curing them in our living room one year, and even though the floor is heated, the nuts in the bottom of the plastic trays didn’t get enough air flow and started to mold.
Hi! When making the crispy walnut recipe, are the walnuts supposed to be shelled before soaking and drying?
Thankyou!
Yes. When the walnuts are still in the shells, water can’t get to them.
Thankyou! As I reread this, I would have had my question answered without bothering you. Sorry about that! Another question…. we’re working through shelling our nuts because I wanted to do the crispy method right away instead of washing the nut in the shell. (saving myself a step??) Anyway, do you crisp the shelled walnut before making the candied walnuts? I think that’s a lovely Christmas present we’d like to try.
Yes, once the nuts are out of the shells, I soak and dehydrate them immediately. Then I store them in the freezer until I use them.
The squirrels always pick my English walnuts before they are ripe. I have still had good luck with husking them right away (although at this stage they are very difficult to husk), wash them and dry and store them for about 2 months before eating and they have turned out wonderful. This year I did not husk them right a way, and after 2 months they were all black and shriveled inside. Any ideas to help in the future?
It sounds like you have answered your own question, Linda. Husking sooner rather than later, even though it’s difficult, is an important part of the nut preservation process.
What dehydrator do you recommend for drying nuts and jerky on a regular basis?
It depends on the volume you want to process. I use my Snackmaster for smaller jobs, and my nine tray Excalibur for bigger jobs, and have been happy with both. I’m sure that any reasonably well reviewed unit would get the job done, but I do highly recommend getting one that has a temperature control. (Most do, but some of the bargain basement ones don’t.) The Excalibur is a little easier to load with straight strips of anything.
My uncle just gave me 2 laundry baskets of English walnuts. He said he already let the sit to dry near a de-humidifier. As I crack them, I’m noticing some of the meats have a white fuzz on them. Is this normal or is this mold? I’m not sure. Thanks!!
White fuzz is bad. It’s most likely mold. We had some issues with it this year, too. The nuts ripened during heavy rains, and even with getting them inside and drying them, some were growing fur. Discard the furry nuts.
Ok. Thank you! I went through the ones I had already cracked and chucked the fuzzies. I feel a lot better now. Thanks again!!
You’re welcome.
My grandparents had a large English walnut tree and processed their own nuts every year. They would shell them, clean them nicely (grandma would use a metal dental pick to get the thin skin!) and then freeze. My grandpa passed in 2013 and we finished off the last bag they processed in 2016! So many good memories.
Your grandmother is a patient woman. I’m glad you have those happy memories with your grandparents.
We had a rain storm knock down hundreds walnuts that were knocked out of their hull when it split.. Is it okay I hose the mud off them before setting out to dry them?
We are in the same boat this year with muddy nuts. I’m planning a rinse before we cure because of all the grime. Just make sure they have plenty of airflow around them after rinsing.
Hi Laurie
I’m in the uk. We have a tree in the south of the country. It’s very mature and has plenty of good nuts. English variety I think. The problem is the tree is not where we usually live and is at a holiday home off the south coast. We are never there when the nuts ripen but normally 2 weeks before. I have tried a few time to pick some and ripen them up off the tree. I picked some a week ago and the husks are browning and dimpling but not cracking as normal. I have opened a few and the nut inside is wet, shrivelled and a little blackened. Not yellow and appetising. Is this because they were picked too early or another reason? Any advise would be appreciated as well as a way to pick them early and ripen them properly if that’s actually possible. Thanks for your time. Ned
Unfortunately for your situation, nuts need to mature on the tree. Picking them before they are fully ripe leads to the what you found – inedible nuts. It would be similar to picking a 3/4 size green peach and hoping for it to fill out and ripen off the tree – not going to happen. Sorry I don’t have better news.
I have a walnut tree that has tons of walnuts on them. I use alot in my cooking. They are green hard shelled , we cracked one open and it is a white walnut inside. I want to no how to make them into cooking walnuts, are the green ones english walnuts or black walnuts? I have no clue, please reply someone so i know if we can safely eat these.
It sounds like you have black walnuts. Those are more difficult to process. First, you have to remove the green outer hulls. I’ve seen a number of recommended methods for doing this, from driving over them to smashing them with a hammer to cutting them off like I do in the black walnut tincture post – https://commonsensehome.com/black-walnut-tincture/
Once you get the hulls off, I would probably power wash them if that’s an option to remove the bits of hull residue still stuck to the shell, and then cure them like the English walnuts. Last year I attempted to cure some without pressure washing the shells, and the shells got a little moldy. Alternatively, you could dry them with a fan on them and turn them frequently to make sure the hull bits dry up.
You’ll need a heavy duty nut cracker or hammer to crack the shells. A standard nut cracker will not do the job. They are safe to eat, it’s just a lot of work to get to the nuts.
Is it safe to eat walnuts (I’ve freshly cracked two days ago) I’ve only just noticed some have white ‘fur’ fungus on them. Others are more obviously inedible; black/green flesh but im just worried i will have to throw them all away now 🙁
Thanks in advance
White fur is not good. Sounds like they weren’t dried properly after harvest. I had issues like that with the black walnuts I tried to dry last year and had to toss about half of them.
Is it ok to use walnuts off the ground that we find after they have wintered over there? It’s the end of March and the snow is finally gone!
If the shell’s intact they may be okay. I’d crack a couple open and see what you find inside before gathering a bunch. If they got too wet over winter, even if the shell is intact, there’s likely to be mold inside.
I’m glad I found your article I have a Carpathian walnut tree. We moved into this home 3 yrs ago and it hasn’t really produced a lot of walnuts until this year I think its because we gave the tree extra water this year and we have picked 5 boxes of walnuts and were drying them out to freeze and use also give away to my friend who is a baker.
Enjoy your nuts!
Have a large abundance of English walnuts this year an got in a hurry to crack them. We found a lot of them are soft. I spread them out on table do you think they will dry out so I can freeze them. Already put 3#,’s in freezer, have another 3# cleaned. Took a bushel in shell in basement spread out on table.
You really need to cure them in the shell before cracking to get a firm nut. The only way to know for sure if you can cure those that are left is to try it. You have nothing to lose.
We have an English walnut tree, when washing the nuts my husband noticed some sank to the bottom and some floated. Does that mean some are bad?
It could be that some are bad, or it could be that some are just drier than others or the nuts are more filled out. Have you tested and compared sinkers and floaters? We never wash ours, so I can’t say what I’ve seen from personal experience.
Hi ! We have 3 100 yr old black walnut trees !!! Some years they are loaded and others years not so much ! I bought my hubby a Nut Wizard (like the nut harvester you talked about) He thinks this is the Best Invention Ever !! After 20 years of picking them up with one of those squeeze picker uppers, one at a time, he now doesn’t mind cleaning up the yard with those thousands of black walnuts !
As for my Carpathian walnuts, I bought 3 about 20 years ago but the deer thought I planted them for them to munch on !
I moved them to another area of our 21 acres, closer to the house and they are now doing well, but growth definitely stunted…So I bought 2 more about 15 years ago ! They are doing Great. This is the first year for nuts and I got 2 !!! Yes, 2 Nuts ! It was fun to watch them mature and I was surprised one day when I went to check on them and 1 was GONE but the other was split open and showing off her shell beauty ! YEAH ! I have it on my counter not wanting to crack it ! But after reading your wonderful post, I Will Today ! Thank You for your Crispy Recipe ! I will save it for next year when I, hopefully, will get more !
Make sure you cure the walnut before you crack it. Uncured nuts are off tasting and rubbery.
Our English walnut tree got chewed by the deer and then run over by the guy digging the pond. Hopefully he can fix the pond yet this year and next year we can try planting again.
Hi Laurie, It was on my counter for about 3.5 weeks. I cracked it and ate it ! What a Joy and SOOO Fresh, not bitter. Thank You for the tip !
Oh I forgot to post to you that I bought the nut cracker you suggested from Amazon ! That’s what I cracked my 1 nut with ! Works perfectly !
Here’s to more nuts next year!
What should have been obvious to me, I say thank you for the tip to keep shells from flying all over. We have the same nutcracker.
Whenever I make pecan pie, we always substitute walnuts. Hubby says they help balance the sweetness of the rest of the pie.
I always prefer fresh nuts. Canned nuts are definitely bitter, and a lot of baked ones, too.
Thank you!
You’re welcome. Sometimes the obvious things are not so obvious. I just happened to think of it when I got tired of chasing down wild nut bits. Walnut pie sounds yummy.
I’ve noticed that many purchased nuts are bitter or off flavor. I’ve gotten spoiled by having access to fresh.